Install and configure Nextcloud in an LXC - Part 2
In this article we will do some fine tuning of our Nextcloud instance.
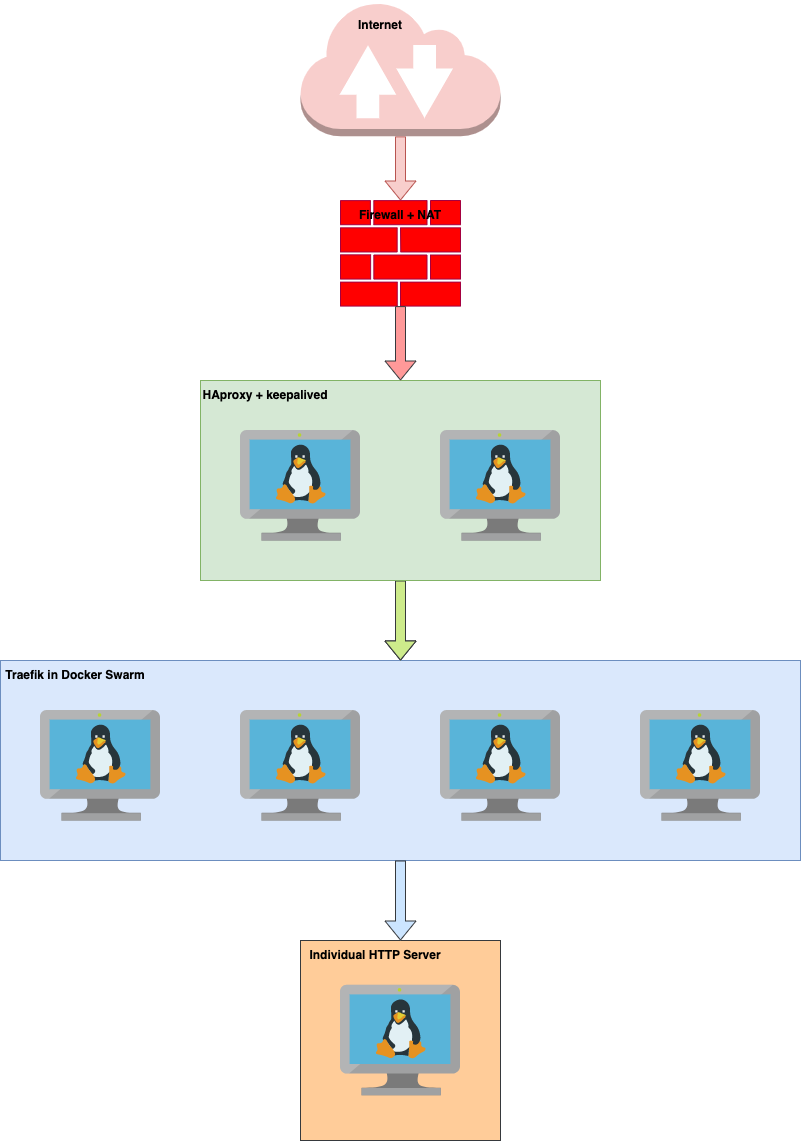
First things first. We will work with the following setup:

Let's check our DNS entries:
host nc.networktechguy.com
nc.networktechguy.com has address 10.5.0.70

host nc-01.networktechguy.com
nc-01.networktechguy.com has address 10.5.0.171
Traefik - Reverse Proxy
So, as explained in the previous post, we will do all of our proxying on Traefik in our Docker swarm (this applies to any instance of Traefik that sits in front of our Nextcloud, not necessarily in Docker swarm). Traefik there takes care of all of our SSL certificates and then forwards traffic to our NC server (Individual HTTP server in the diagram). For that reason we will have two DNS entries in our DNS server - one for the NC host itself (nc-01) and one for our 'public' domain (nc).
To achieve this, we will add a file in our dynamic files directory (confs) that Traefik will pick up:
nano confs/ntg-nextcloud.ymlFile should look something like this:
http:
  services:
    ntg-nextcloud:
      loadbalancer:
        servers:
          - url: "http://nc-01.networktechguy.com"
        passHostHeader: true
First part is just a regular loadbalancer entry which just points to our NC instance (nc-01.networktechguy.com) with passing HostHeader, while the second part defines the router and what host rule needs to be hit so that the traffic is passed to the loadbalancer. In this case, the rule states that when a flow comes to the address nc.networktechguy.com, use service called ntg-nextcloud (defined above) and then apply tls certresolver called le (for Let'sEncrypt) that's defined in the main Traefik configuration file in docker-compose. It should use websecure entrypoint (HTTPS vs HTTP) and as for middlewares, it should use a pre-defined middleware called secHeaders-nc that should look something like this:
http:
  middlewares:
    secHeaders-nc:
      headers:
        browserXssFilter: true
        contentTypeNosniff: true
        frameDeny: true
        stsIncludeSubdomains: true
        stsPreload: true
        stsSeconds: 31536000
        customFrameOptionsValue: "SAMEORIGIN"
        customResponseHeaders:
        X-Robots-Tag: "none"
With this taken care of, we should be able to hit our NC instance through an HTTPS address, if DNS entries are in place.
If everything is OK, you should see an entry like this in your Traefik dashboard:

This basically means that Traefik has picked up the configuration from the configuration file and is now ready to route traffic to our NC instance. Also, if your Traefik is configured to pick up SSL certificates from Let'sEncrypt or ZeroSSL, a proper SSL certificate should also be associated with your router/service.
Fixing Common Issues
Trusted Domains
If you try accessing NC through this new domain name though, you will be hit with a message like this:

To resolve this issue, we will edit /var/www/nextcloud/config/config.php (or wherever you chose to install it) and look for the following entries:
  'trusted_domains' =>
  array (
    0 => 'nc-01.networktechguy.com',
  ),
We will add another entry to the array with our 'proper', Traefik served domain name, so the final array will look like this:
  'trusted_domains' =>
  array (
    0 => 'nc-01.networktechguy.com',
    1 => 'nc.networktechguy.com',
  ),
Save the file and reload the page in your browser; it should now open as expected.
PHP Memory Limit
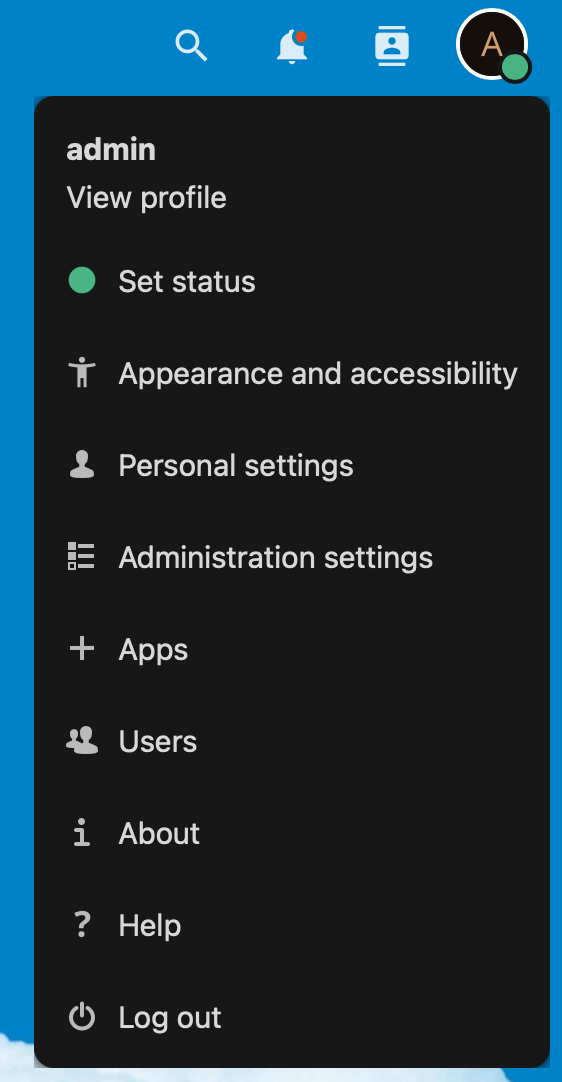
Click on the top right icon representing you as user (Admin) and choose Administration Settings:

The first page that opens is NC instance Overview. This will give you some information about the status of your NC instance, and if this is a fresh install, it will most likely complain about at least a few things. In our case, we have the following:

Red one should not be ignored because they will impact stability of the system and also frontend speed, which will in turn affect your user satisfaction. So let's fix the red one, PHP memory limit, first.
Edit your php.ini file, most likely at /etc/php/8.1/fpm/php.ini and look for the entry called memory_limit and set the value to 512M (default value is probably set to 128M).
Some other values to change in php.ini are:
opcache.enable=1
opcache.interned_strings_buffer=64
opcache.max_accelerated_files=50000
opcache.memory_consumption=512
opcache.save_comments=1
opcache.revalidate_freq=1
opcache.max_wasted_percentage=15
opcache.validate_timestamps=0
opcache.file_cache_fallback=1
opcache.fast_shutdown=1
Additionally, you may want to change /etc/php/8.1/fpm/pool.d/www.conf as well, parameter you will be looking for is php_admin_value[memory_limit] and it needs to be set to the same value as memory_limit parameter in php.ini.
Restart php8.1-fpm and reload the Overview page in Nextcloud. If everything is OK, your Overview status report should now come back with only yellow and white entries.
Reverse Proxy in Nextcloud
Let's fix the next one, reverse proxy. To do that, we will once again edit NC config.php file and add following entries before the end of the file:
  'trusted_proxies' =>
  array (
    0 => '172.64.0.0/13',
    1 => '173.245.48.0/20',
    2 => '103.21.244.0/22',
    3 => '103.22.200.0/22',
    4 => '103.31.4.0/22',
    5 => '141.101.64.0/18',
    6 => '108.162.192.0/18',
    7 => '190.93.240.0/20',
    8 => '188.114.96.0/20',
    9 => '197.234.240.0/22',
    10 => '198.41.128.0/17',
    11 => '162.158.0.0/15',
    12 => '104.16.0.0/13',
    13 => '104.24.0.0/14',
    14 => '131.0.72.0/22',
    15 => '10.0.0.0/8',
  ),
We chose to add all these IP addresses because our public DNS provider is Cloudflare and these are all IP address ranges of their proxy service. Finally, entry #15 is our private subnet that we use in our homelab environment. We could limit that to a smaller subnet, but since it's not expected that any hits will come to our NC instance from outside of our network with these addresses as they are non-routable, we can leave the whole A-class of 10.0.0.0/8 here.
Once you add your proxies to your configuration file, refresh the Overview status page and it should now have one less complaint.
E-mail Settings
Next one is about email settings. You can set those under Basic Settings, or you can enter them directly in the config.php file, up to you. Once you enter them under Basic Settings, it will be updated in the config.php file and vice-versa.
Final result should be something like this:
  'mail_smtpmode' => 'smtp',
  'mail_smtpsecure' => 'tls',
  'mail_sendmailmode' => 'smtp',
  'mail_smtpauth' => 1,
  'mail_from_address' => 'address(WITHOUT_DOMAIN!)',
  'mail_domain' => 'domain.com',
  'mail_smtpauthtype' => 'LOGIN',
  'mail_smtphost' => 'server.domain.com',
  'mail_smtpport' => '587',
  'mail_smtpname' => '[email protected]',
  'mail_smtppassword' => 'PASSWORD',
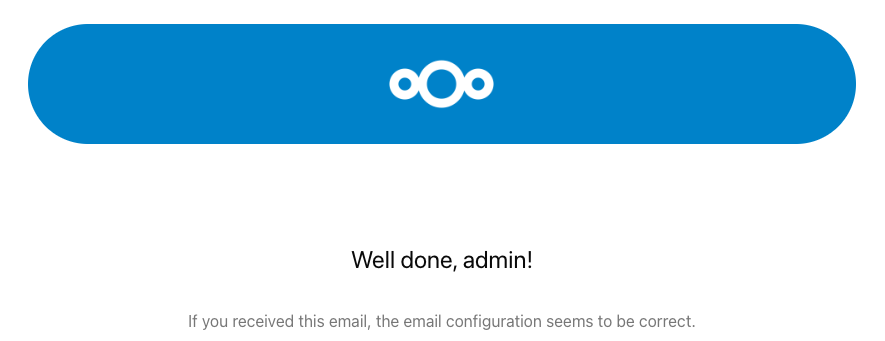
If you entered everything correctly, you should receive an email from the server (don't forget to update your own email address in the profile, otherwise Nextcloud won't know where to send an email to):

Country Code
Overview status page should now have just a few complaints. One of them is probably about a phone region, so let's change this as well - edit your config.php and add an entry like this (change to whatever your country code is):
'default_phone_region' => 'CA',Refresh the page and that complaint should be gone as well.
SVG support
Let's deal with the last one on our list, the one about no SVG support in our php-imagick. To resolve this, simply install libmagickcore-6.q16-6-extra:
apt install libmagickcore-6.q16-6-extraRefresh the page and that warning should be gone as well.
Traefik middlewares
Finally, we are left with one last complaint - no memory cache is configured. We will resolve this by installing Redis, but before that, another set of complaints has come up:

Since we are accessing the NC instance through Traefik, we will resolve these issues there. To start, we will create a few middlewares:
http:
  middlewares:
    rpl-caldav-cardav:
      replacepathregex:
        regex: ^/.well-known/ca(l|rd)dav
        replacement: /remote.php/dav/
    rpl-nodeinfo:
      replacepathregex:
        regex: ^/.well-known/nodeinfo
        replacement: /index.php/.well-known/nodeinfo
    rpl-webfinger:
      replacepathregex:
        regex: ^/.well-known/webfinger
        replacement: /index.php/.well-known/webfinger
Finally, we will add these middlewares to our ntg-nextcloud.yml file in dynamic files directory. Final line that invokes middlewares should look like this:
middlewares: secHeaders-nc, rpl-caldav-cardav, rpl-nodeinfo, rpl-webfingerSave the Traefik file and if everything is OK, it should pick the new configuration and there should be no more complaints other than the one about memory caching.
Memory Caching
Finally, we will deal with memory caching issue.
Let's start by installing a few packages:
sudo apt install php8.1-apcu redis-server php8.1-redisWe have to be specific when installing anything related to PHP on bullseye, otherwise default repository will be used and pull PHP 8.2 packages.
Next, edit Redis configuration and change the following:
port 6379
# unixsocket /var/run/redis/redis-server.sock
unixsocketperm 700
to:
port 0
unixsocket /var/run/redis/redis-server.sock
unixsocketperm 770
Save and exit the file once you've made the changes.
Next, add Redis user to www-data group:
usermod -aG www-data redisOne more thing to do is to add Redis configuration to config.php:
  'memcache.local' => '\\OC\\Memcache\\APCu',
  'memcache.distributed' => '\\OC\\Memcache\\Redis',
  'memcache.locking' => '\OC\Memcache\Redis',
  'redis' =>
   array (
   'host' => '/var/run/redis/redis-server.sock',
   'port' => 0,
   'timeout' => 0.0,
  ),
Basically, what this does, is that it uses APCu for local caching, Redis is used for distributed caching and file locking. Since we've set up Redis on the same host as our NC instance, and it's the recommendation from Nextcloud team, we have set up our Redis server to listen on a Unix socket instead of a TCP port (this is why we changed listening port from 6379 to 0 in one of previous steps). You can read more details about NC memory caching here:
As a good measure, we will reboot the system to make sure that all services are restarted.
If everything went well, NC instance Overview should be like this:

Network Share
The last part of this project will to add a network share to our server so that we can mount our NC data directory onto a NAS shared folder. This will add another level of security to the system, as all of user's data will be stored on a NAS and it can be encrypted there. Since this is a local network with more than decent speeds, this does not add to a significant delay and being on a NAS, we can easily extend the volume there if our users' needs grow for more storage. Basically, benefits outweigh the risks here.
To do this, we will install cifs-utils package on our system:
apt install cifs-utilsNext, we will create a directory and a subdirectory on our server where we will mount the network share:
mkdir /share/Nextcloud -pWe will also create a NAS-credentials file that will be used for automatic mounting of the network share during the boot process:
nano /etc/nas-credentialsFile should look like this:
username=ncuser
password=password_here
Also, we will set the file privileges to 400:
chmod 400 /etc/fstabNext, let's find out what the user and group ID for www-data is:
id www-data
uid=33(www-data) gid=33(www-data) groups=33(www-data),113(redis)
The last thing to do is to set the automounting in /etc/fstab by adding the following line
//10.5.0.51/NetworkTechGuy /share/Nextcloud cifs defaults,rw,credentials=/etc/nas-credentials,uid=33,gid=33,dir_mode=0700,file_mode=0700To explain this in a little more details:
- SMB network share is available at
//10.5.0.51/NetworkTechGuy - share will be mounted locally at
/share/Nextcloud - filesystem of the network share is
cifs - we will set defaults as mounting options, allow read-write, credentials used to access the share are available at
/etc/nas-credentials, the owner of the mount and all the files in it will be user withID 33and group withID 33, and all files will have0700permission set to it (this should lock the files to onlywww-datauser while no one else has access to it; this shouldn't be a problem since NC runs aswww-datauser and all user files are saved on the filesystem withwww-dataas the owner of the files)
Finally, reboot the system and, after reboot, make sure that the network share has been mounted to the filesystem. To do that, run df -ah and look for your network share. It should look like this:
//10.5.0.51/NetworkTechGuy 500G 207K 500G 1% /share/NextcloudNow we just have to tell Nextcloud to use this new network share to store data to. First, we will disable web server to make sure that nothing is being written while we make changes.
systemctl stop nginxNext, we will move the data directory to its new location:
mv /var/www/nextcloud/data /share/Nextcloud/ -rAs for the last step, we need to tell Nextcloud to look for the data at a new location. To do that, we need to edit config.php again. Change this:
'datadirectory' => '/var/www/nextcloud/data',to
'datadirectory' => '/share/Nextcloud/data',Of course, replace the destination with whatever the location is in your setup.
Let's start the web server again and check if we can access our NC instance. This was the final step in fine tuning our new NC instance. Now we can install all the apps we want and create new users.
Background jobs
Final recommendation for the basic tuning of your Nextcloud instance is related to background jobs - these are jobs that your NC instance will do in the background - such as database optimisations, cleanups, etc.
By default, AJAX is selected as your background scheduler. This is not a bad option in case you have a single user on your NC instance. However, if you have more users, cron is a recommended method for scheduling background jobs. To do that, we will first install cron on our system:
apt install cronOnce cron is installed, we will add a job to www-data user:
crontab -u www-data -eAdd the following line to your www-data crontab:
*/5 * * * * php --define apc.enable_cli=1 /var/www/nextcloud/cron.phpP.S. Please note that all the commands need to be ran either through root user or via sudo.
If you have any comments, please leave them below.
Member discussion