Starting a homelab - Part 03 - Creating your first VM
How to start a homelab - Creating your first VM
EDIT: For some reason, this video is not properly showing in Safari on my computer (Chrome and Firefox work). If that's the case with you as well, you can find the video here.
First VM we are going to install in our brand new ESXi hypervisor will be Windows 10. I will be installing Windows 10 Enterprise LTSC edition, but the process for any of them will be the same.
There are a couple of pre-requisites for this - you need to have the ISO image ready on your computer and you need to create a datastore folder on the ESXi server and upload the image there for ESXi to use it.
To do that, log into your ESXi and choose Storage from the left, tab Datastores is the first one and open by default. Click on Datastore browser and click on your datastore. There will just be a directory called something like .sdd.sf or something similar so we need to create a new folder. I called it ISOimages but you can call it whatever you like. Then, click on that newly created folder and on the left side of the window click on Upload. Find your ISO image on your computer and upload it to the datastore. If you have 1Gbit/s NIC, it should take you around a minute to upload it:
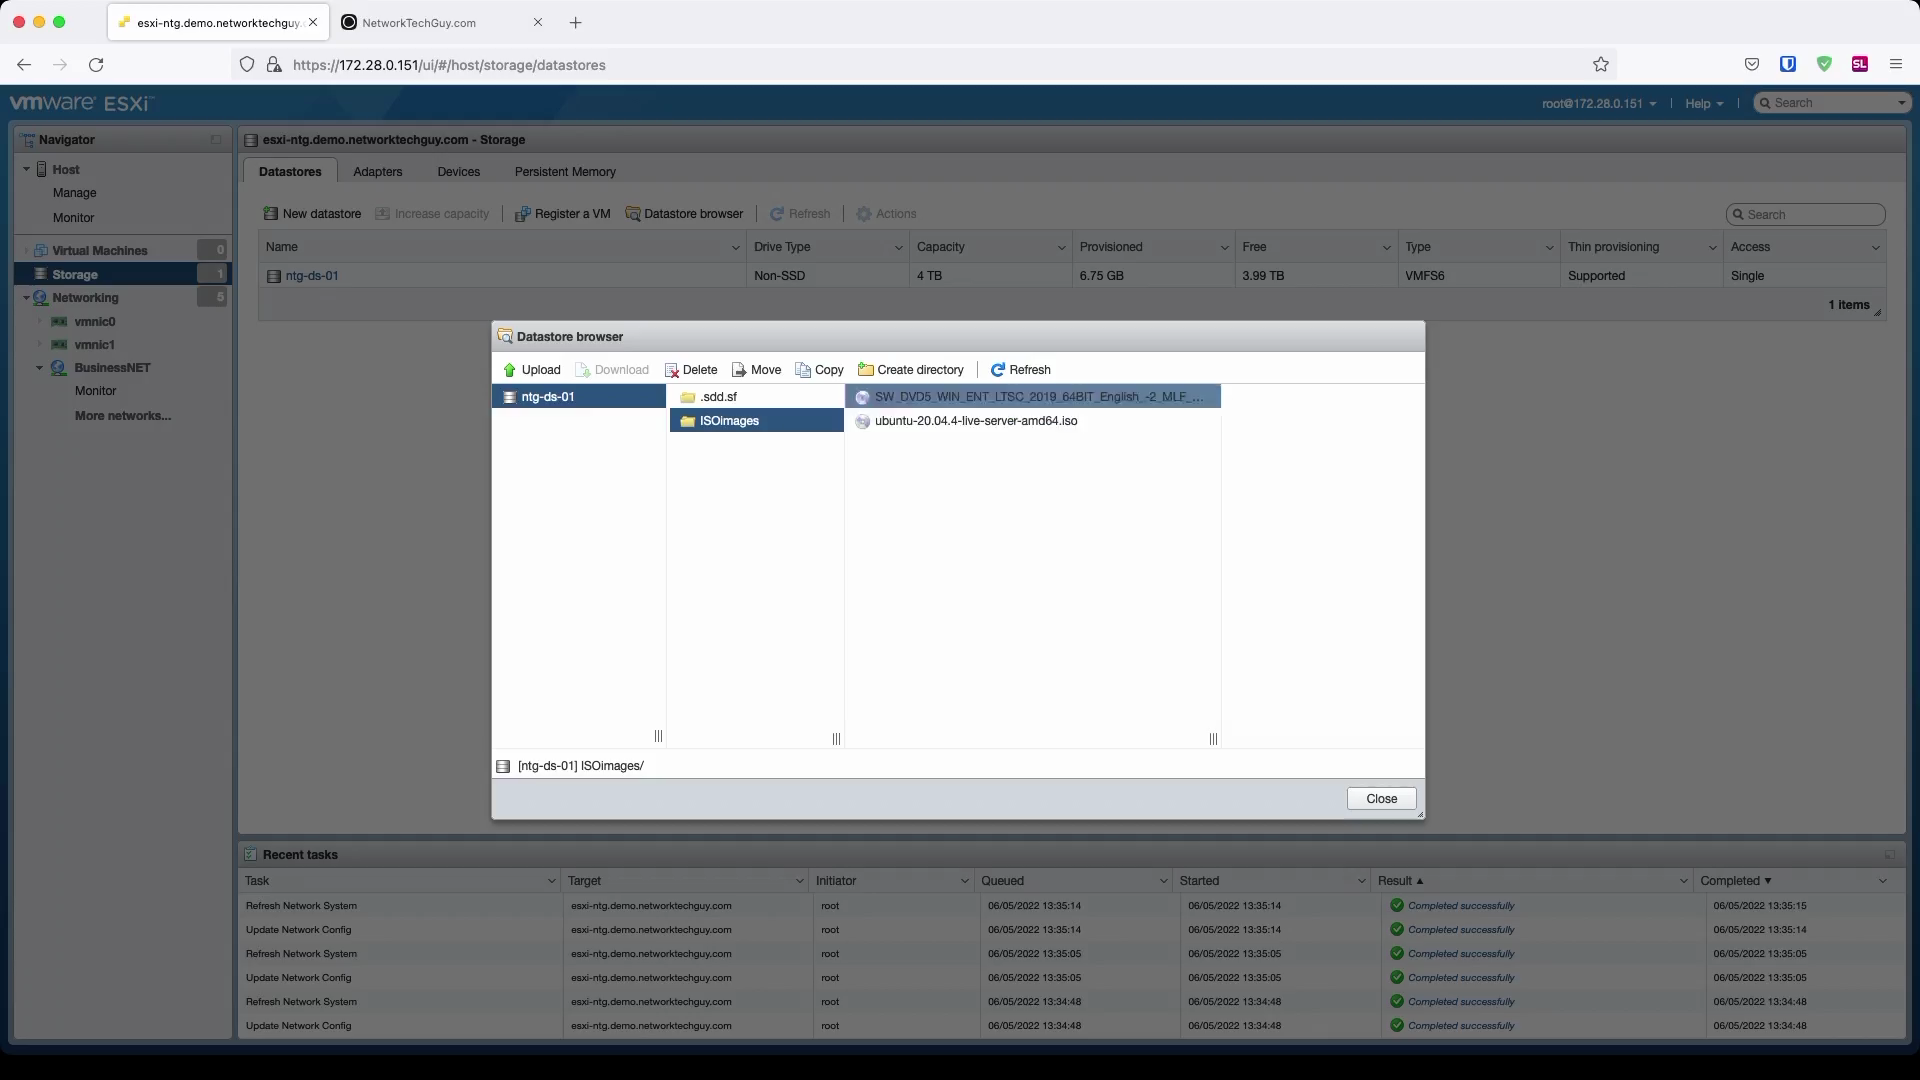
Once the image is uploaded, go back to Virtual Machines on the left and then click on Create / Register VM:
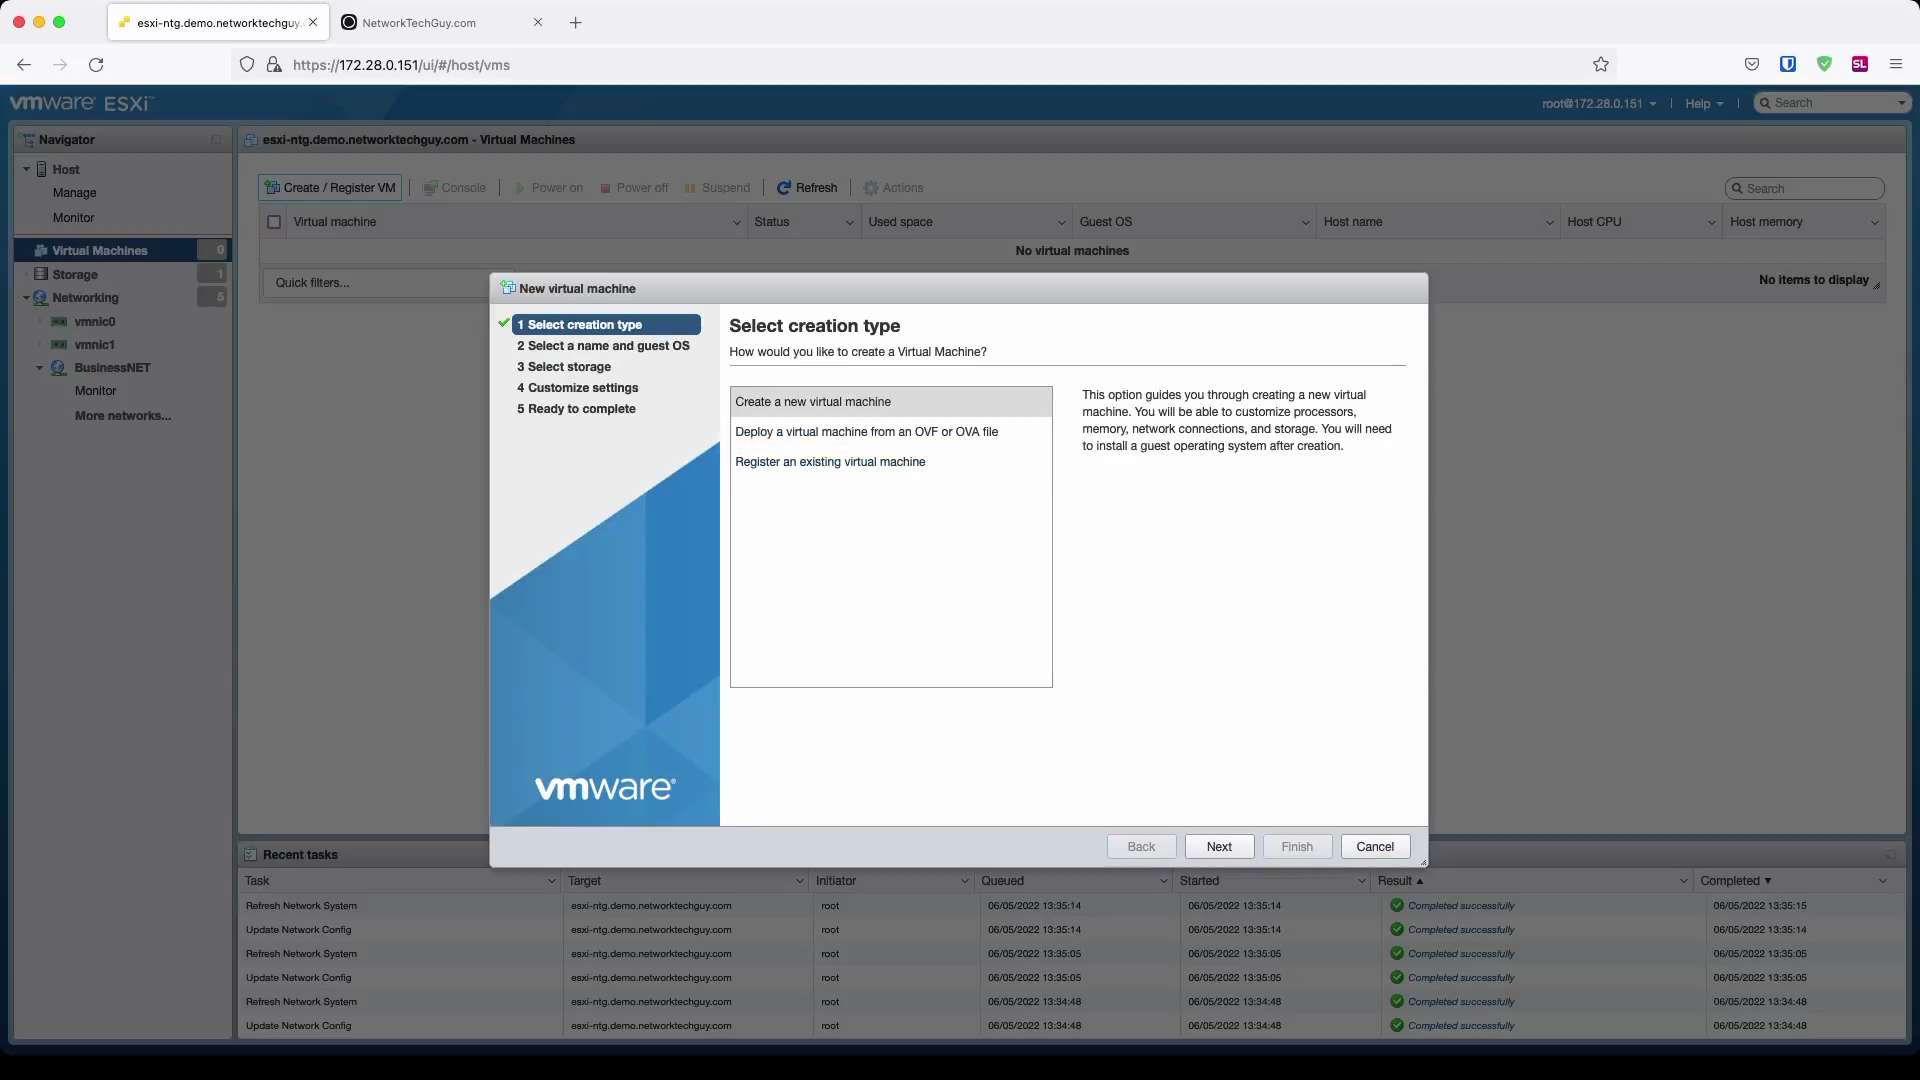
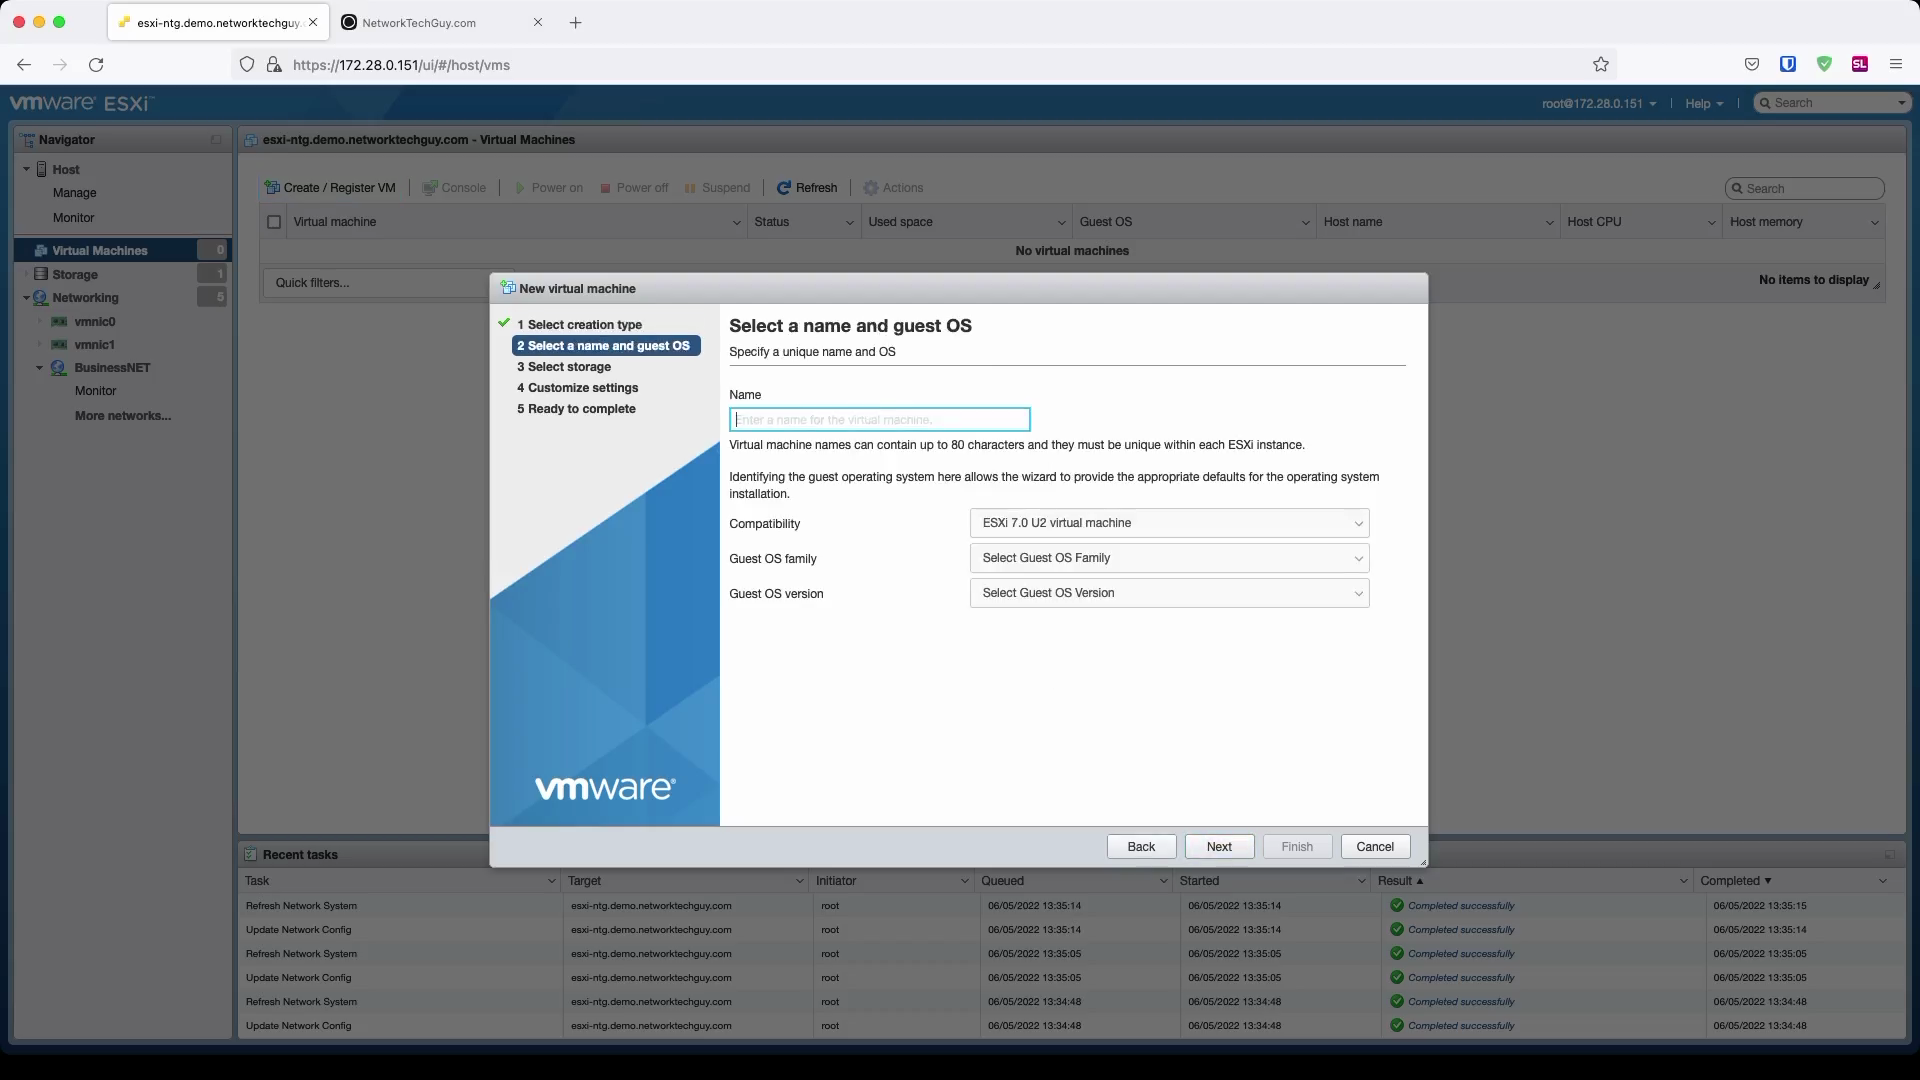
On the next screen, give a name to your new VM and then select options:
Compatibility- usually the latest version of the compatibility is the best choice - for me, that will beESXi 7.0 U2 virtual machineGuest OS family- chooseWindowsGuest OS version- chooseWindows 10 (64 bit)
Once finished, click on Next.
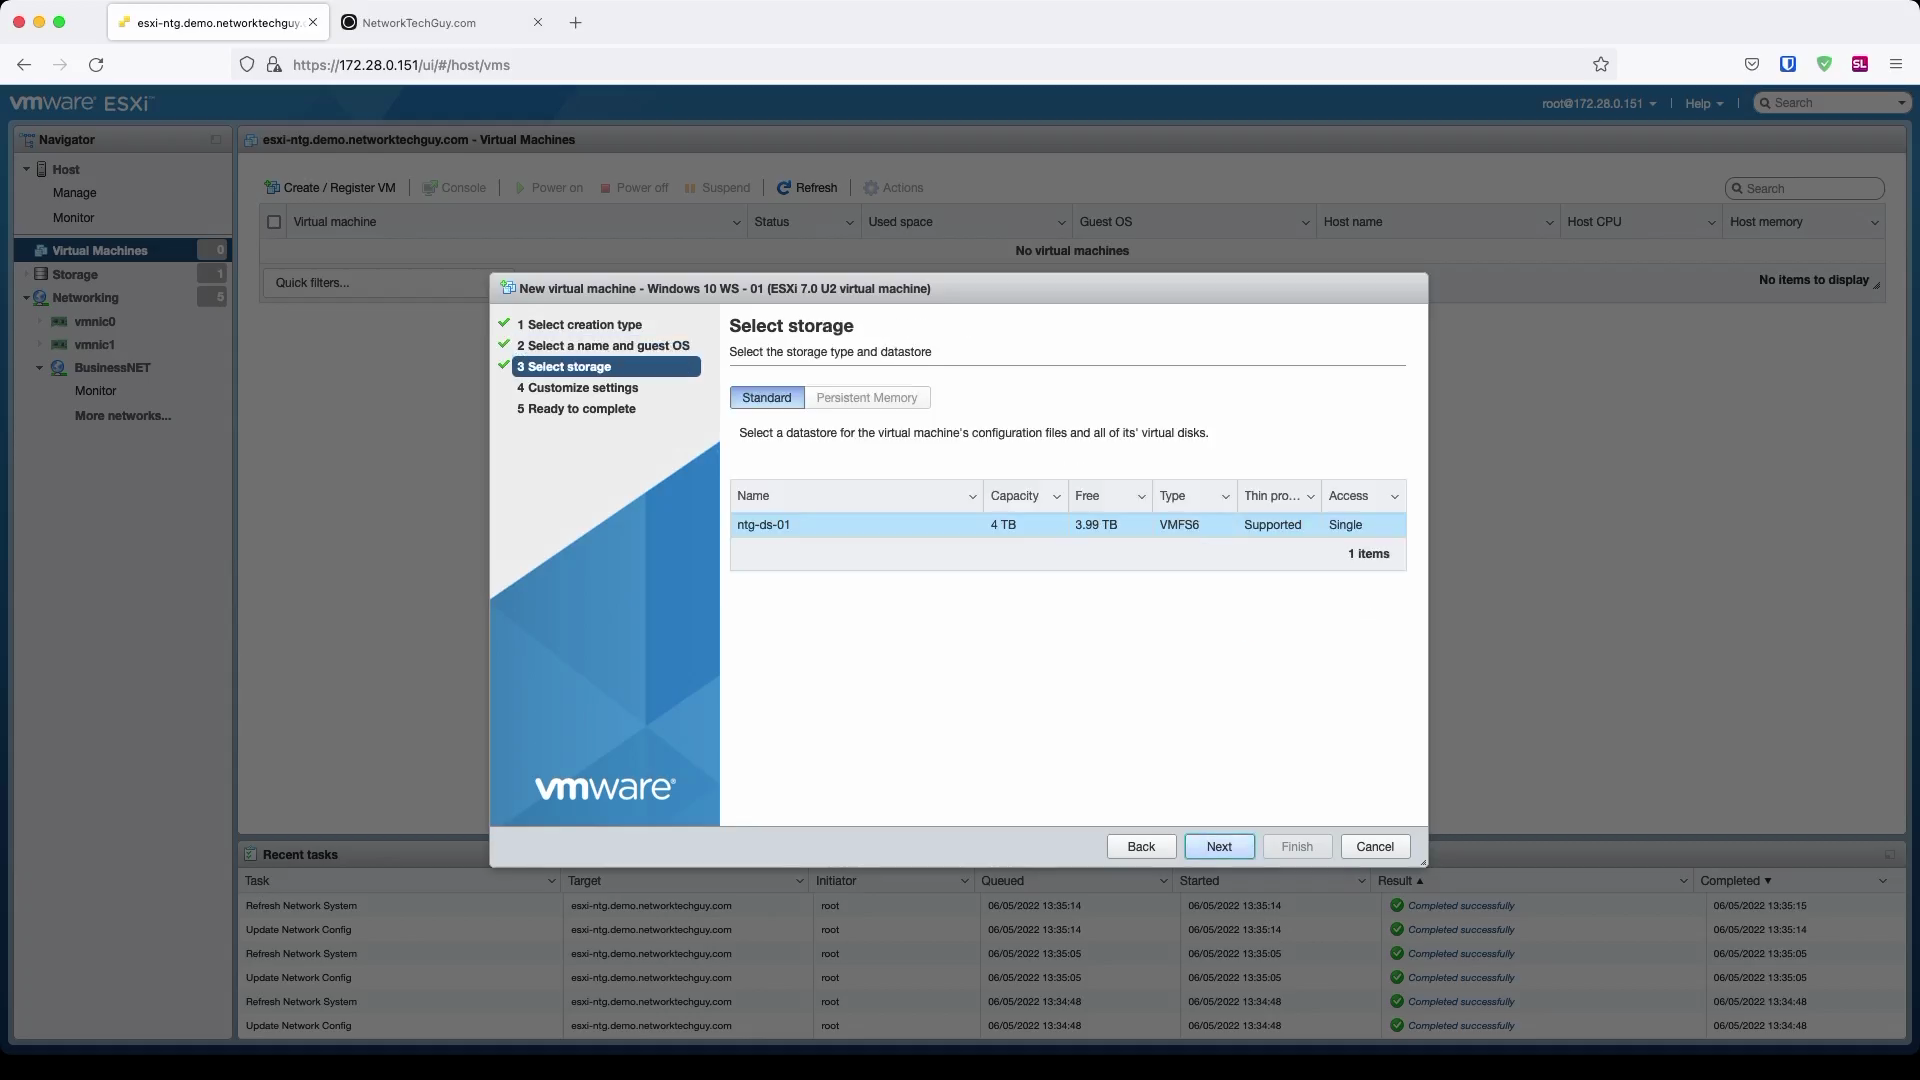
Under Storage select the datastore where you want to install it. In my case, I only have one datastore so I will install it there. Click Next when you're finished.
ESXi will choose HW properties of your VM based on the guest OS you chose earlier. This will be a proposed minimum of HW requirements for the OS to function properly. Please keep in mind that these properties are not written in stone and that you can modify them as you will, just don't be surprised if the system is not working properly if you assign less resources to it than what ESXi chose.
I modified these settings a little bit by giving a little bit more juice to the VM (CPU and RAM) and also a little bit more extra HDD space.
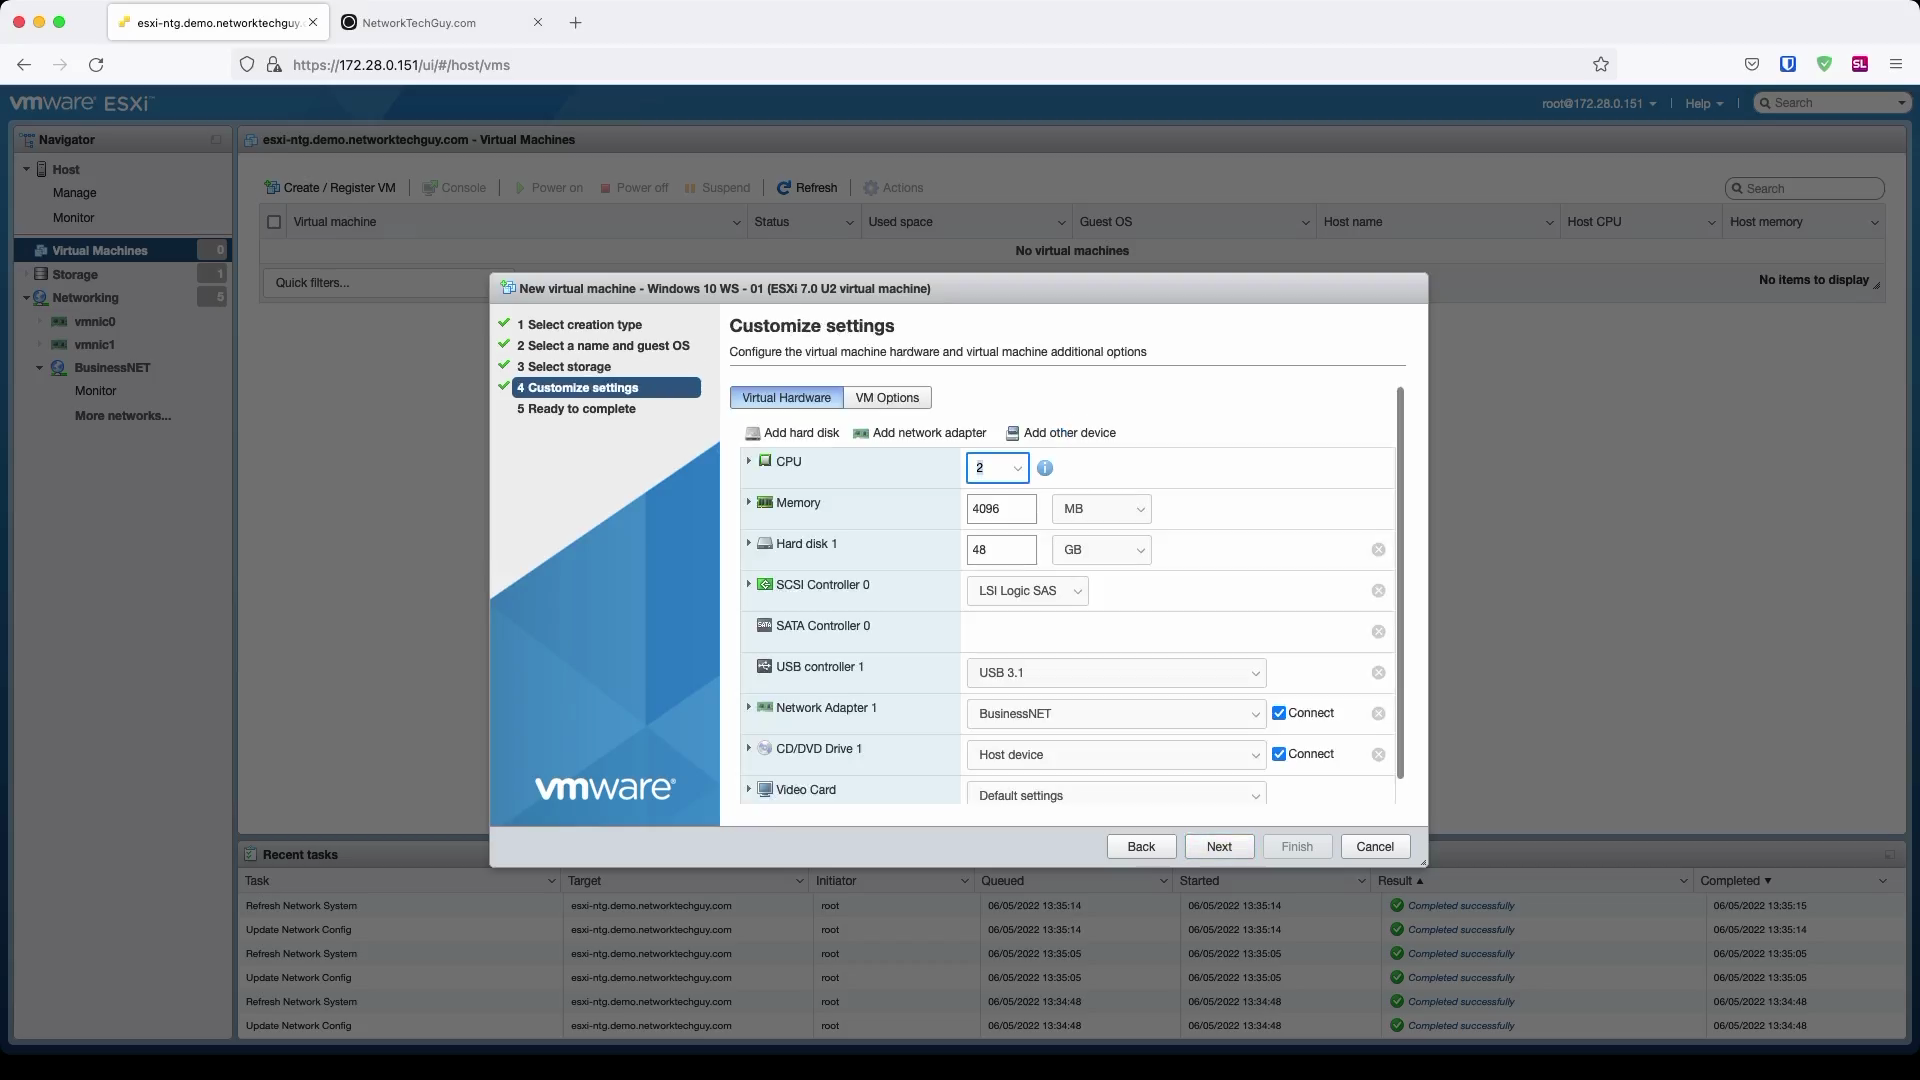
When it comes to the HDD that you assign to the VM, there are 3 sub-options that you can choose for how the disk space is provisioned to the VM. The reason for this is simple - there is no HW HDD or SSD that is assigned to the VM - what you are assigning to it is a chunk of space on the HDD/SSD controlled by the ESXi hypervisor, and all that in a form of a file from the perspective of ESXi. You will notice later on that your HDD in the VM is nothing more than a file on the datastore of your ESXi.
Why is this important? Because there are those 3 sub-options I mentioned. I don't deal with any super-sensitive stuff in my environment and I regularly back everything up, so I usually choose Thin provisioned. What that means is that ESXi presents this space to the VM, so VM in this case will think that it has 60 GB of HDD diskspace, but this space is not reserved on the ESXi datastore. For this reason, you need to make sure that you don't overprovision your VMs because if some of them use their assigned disk space 100% and total of that is also the same size as your whole datastore, your whole datastore will also be filled up 100% - which is not a problem for the datastore or ESXi, but for the rest of the VMs that would mean that they are presented with free disk space, while in reality, the datastore is already at 100% capacity and it can no longer write anything. So, just be mindful of that.
When you do Thick provision, the disk space is immediately taken for the whole size, so you always know how much disk space you have left on the datastore. There are some differences between Lazy zeroed and Eager zeroed (security and such), but in most cases you can freely go with Lazy zeroed. If you want the most security and speed, go for Eager zeroed, just be aware that creation time for such a datastore file may take a little bit longer.
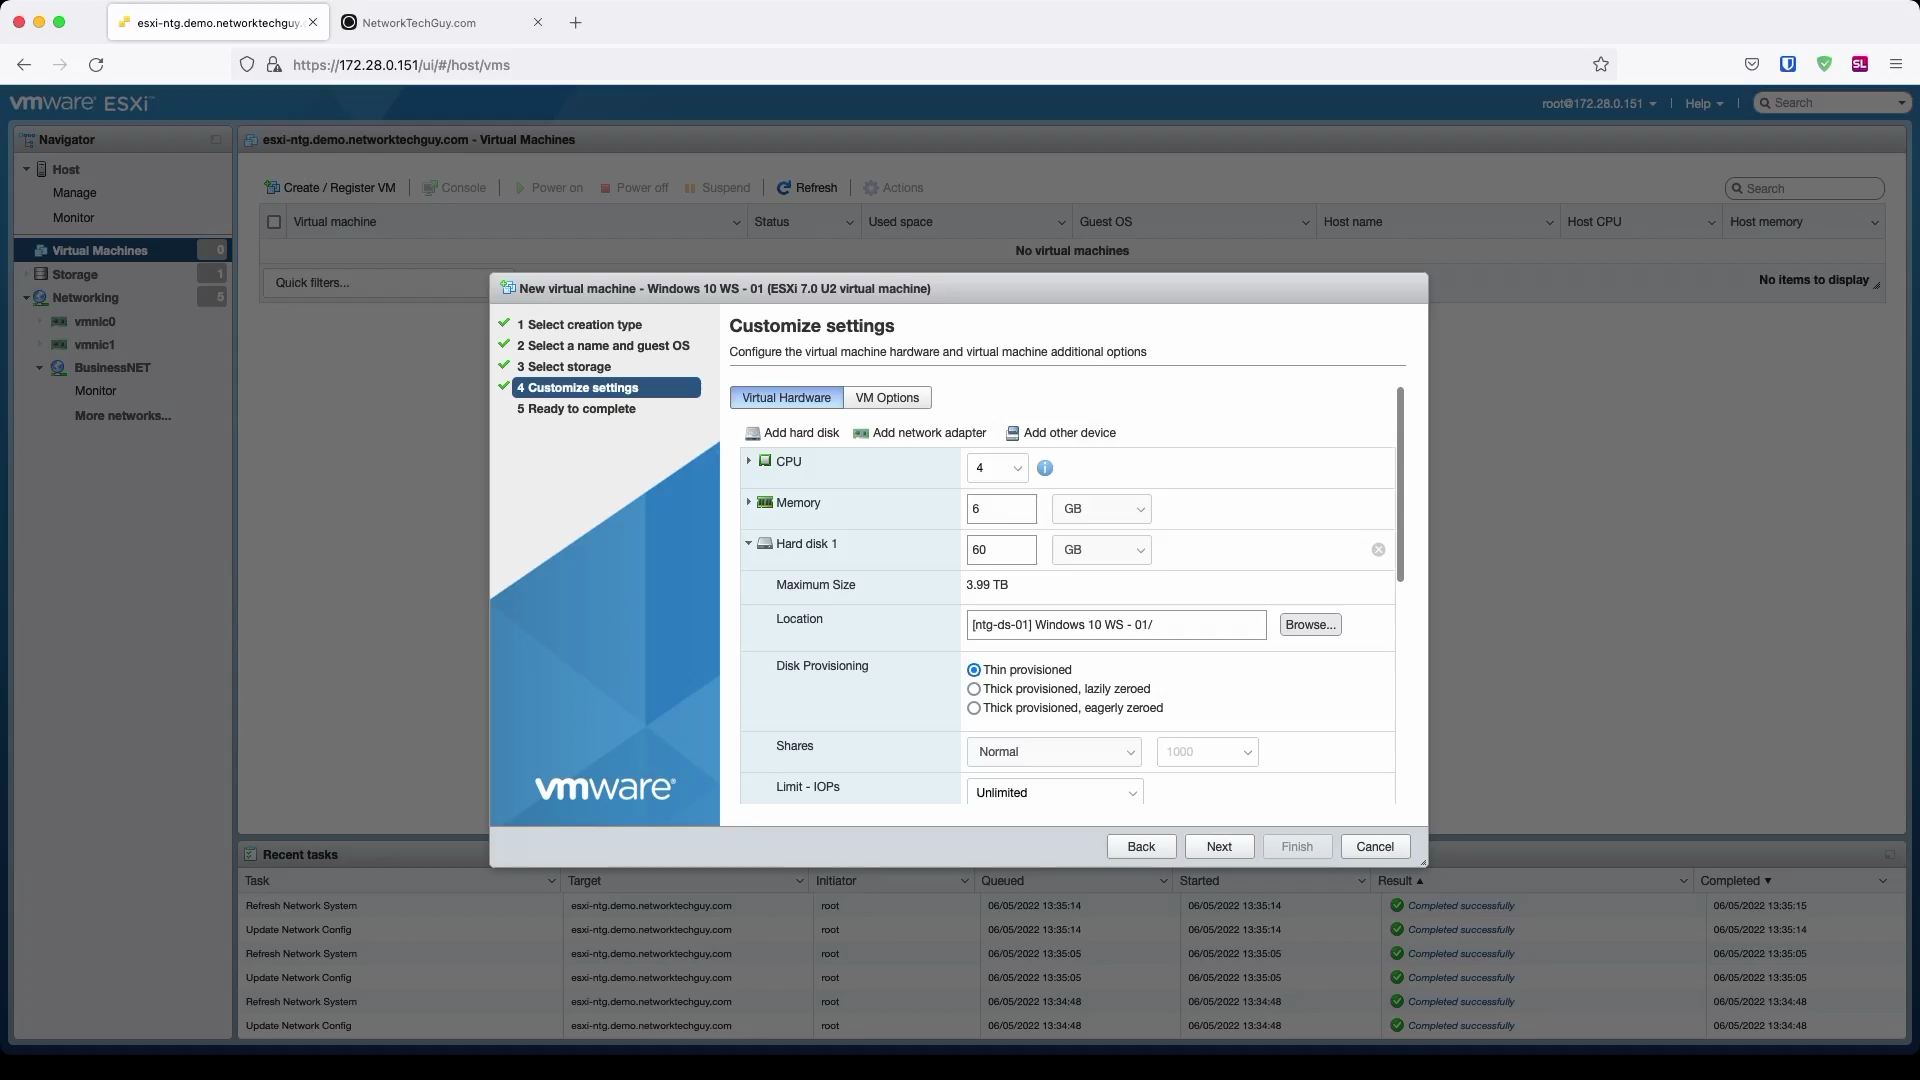
Lastly, under CD/DVD drive make sure that it's set to Datastore ISO file. When you change that, point it to the ISO image that you uploaded earlier and make sure that the checkmark is enabled. Once you're happy with your choice of HW customizations, press Next and then after reviewing everything, Finish.
Make sure that you're happy with the customization because some things can't be edited later on. This is mostly related to hard disk settings; while you can change the size of the HDD by making it larger, the opposite is not possible (making it smaller). Also, once you choose the provisioning type, you can no longer change it afterwards.
After you clik on Finish, under Virtual Machines you should see your newly created VM.
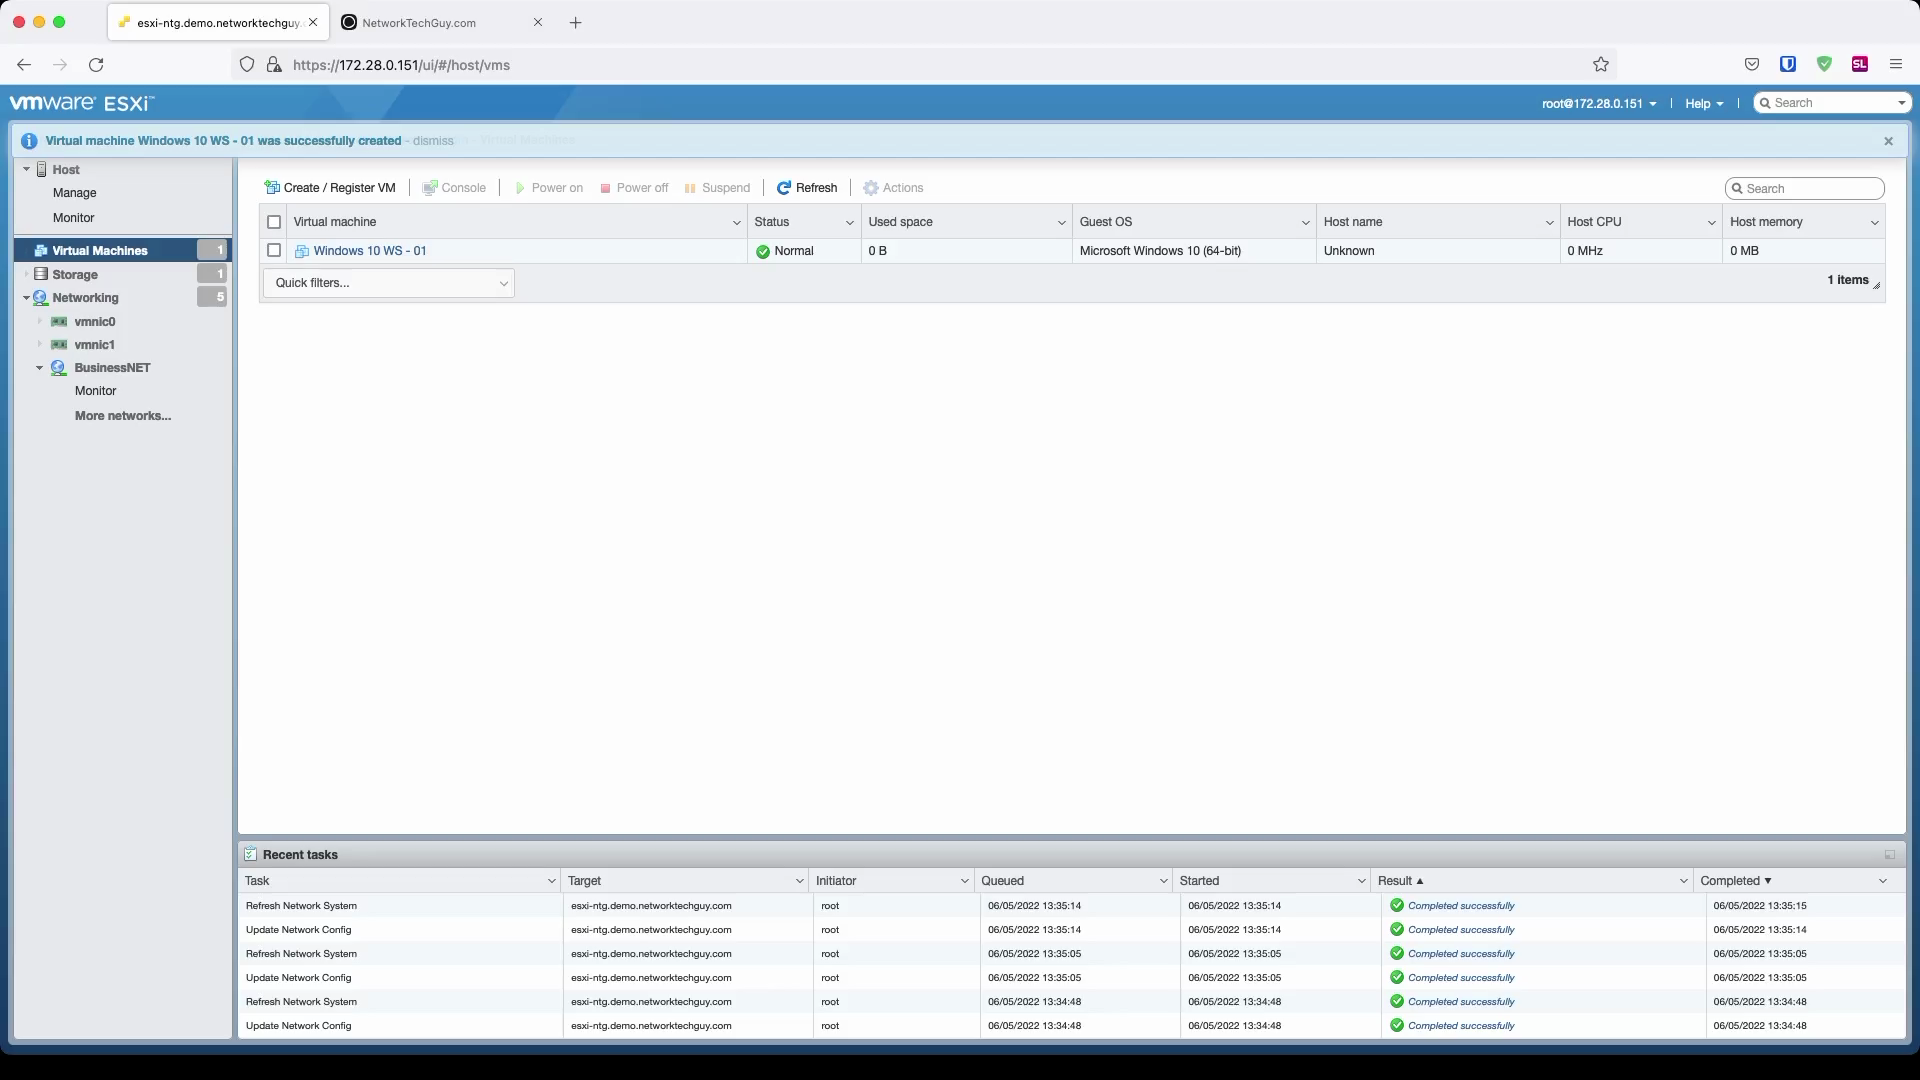
You need to click on it and the start it. This will then start the installation process.
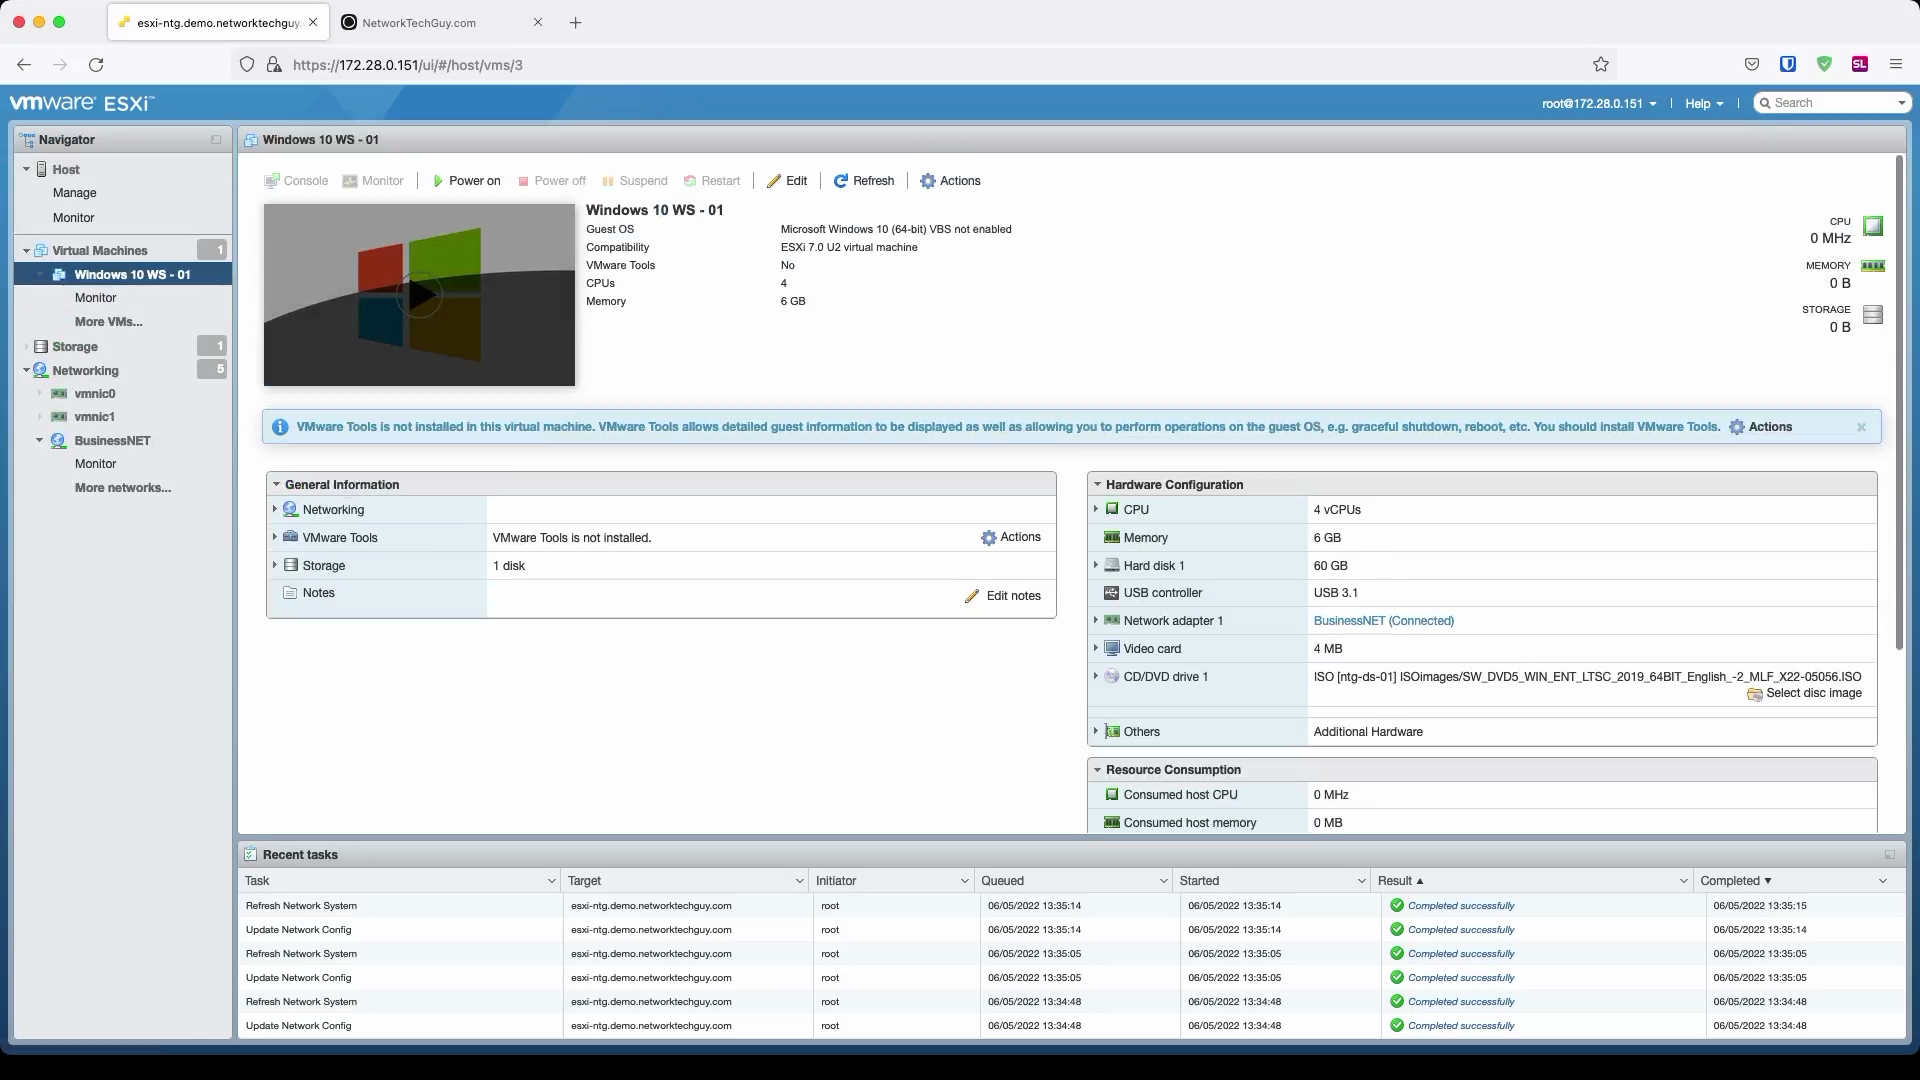
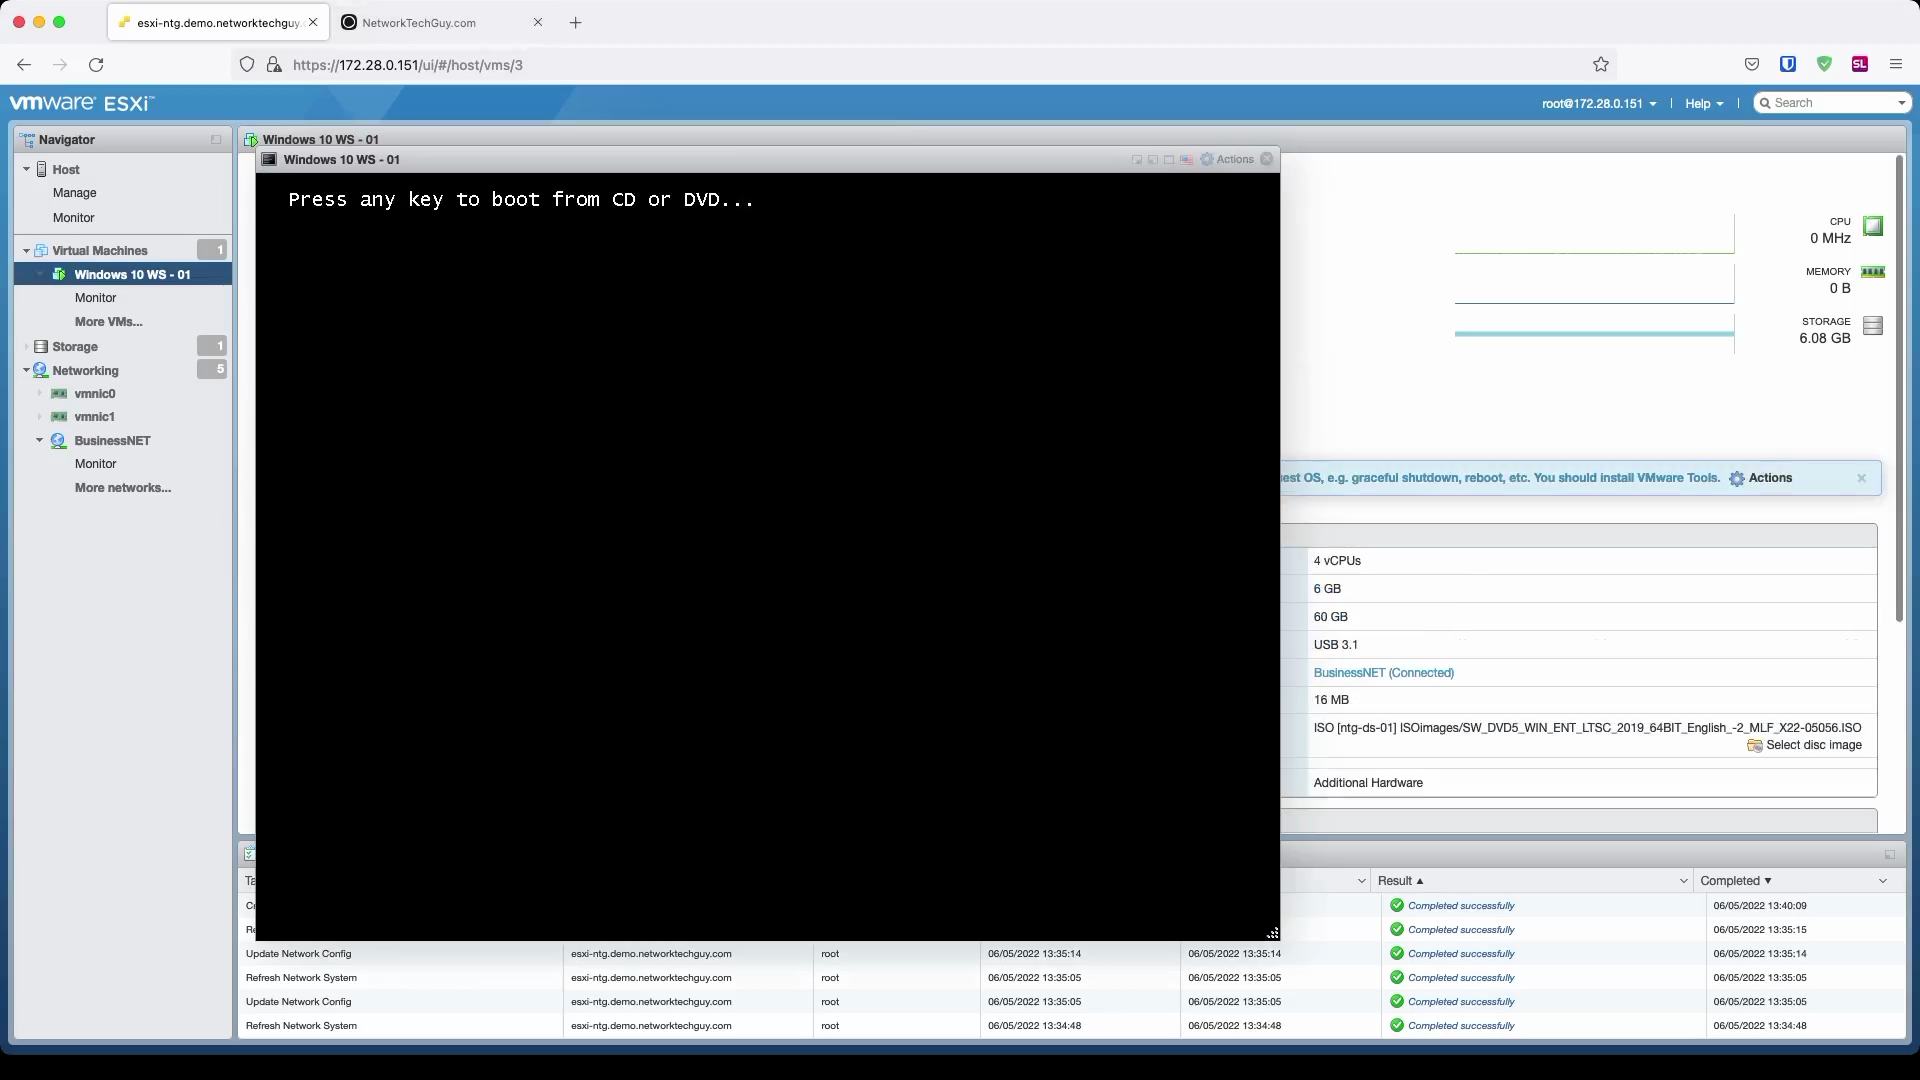
Once the installation process has started, follow the instructions and install your Windows 10 VM.
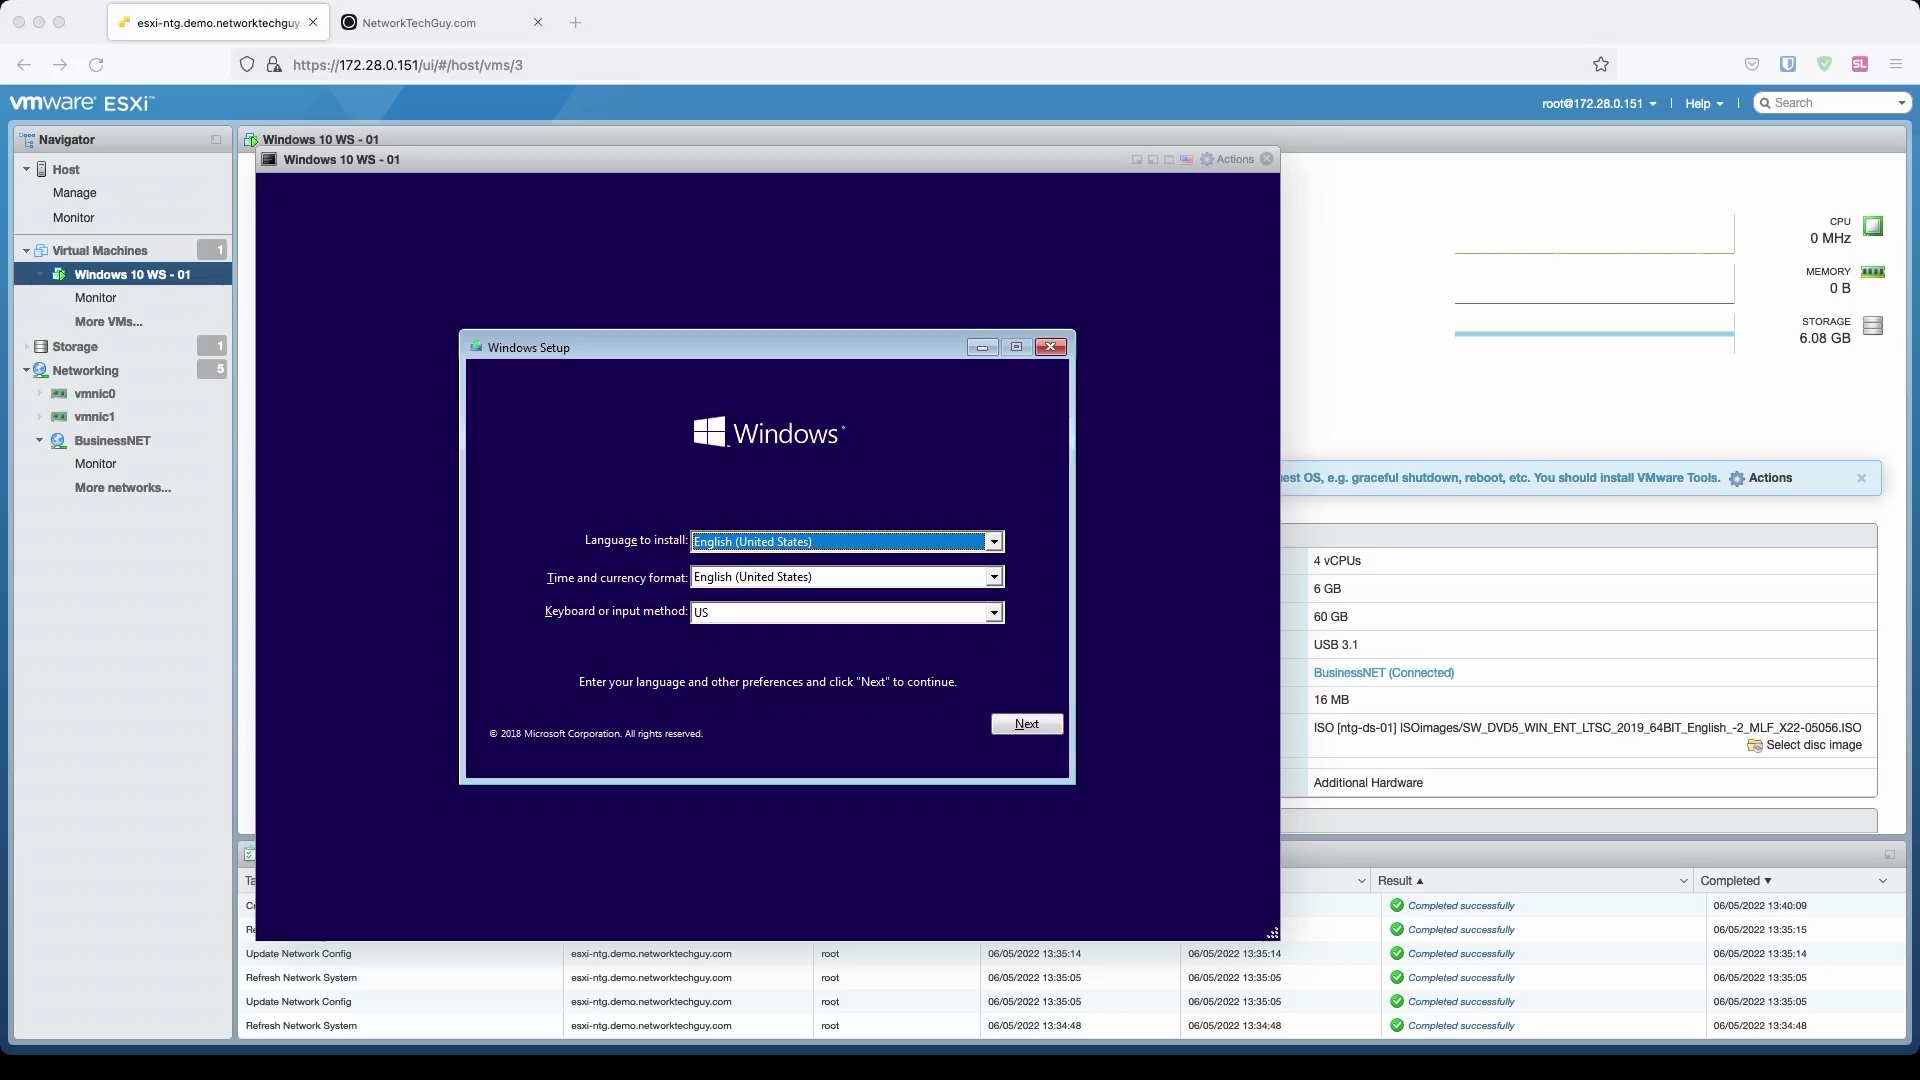
For the whole process of how to create & install your first VM and basic customization of the VM, watch my Youtube video.
Last thing I want to mention here is how to create a template of the VM you just created. Why would you need that?
Let's say that in the future you want to avoid the whole process of creating the VM from the scratch and also avoid going through the tedious Windows 10 updating process. Templates will allow you to quickly deploy your VM and the only thing you will have to change are IP address (can't have two of them with the same IP!) and do some additional updating if the template is a little bit older.
Let's take a look at the process:
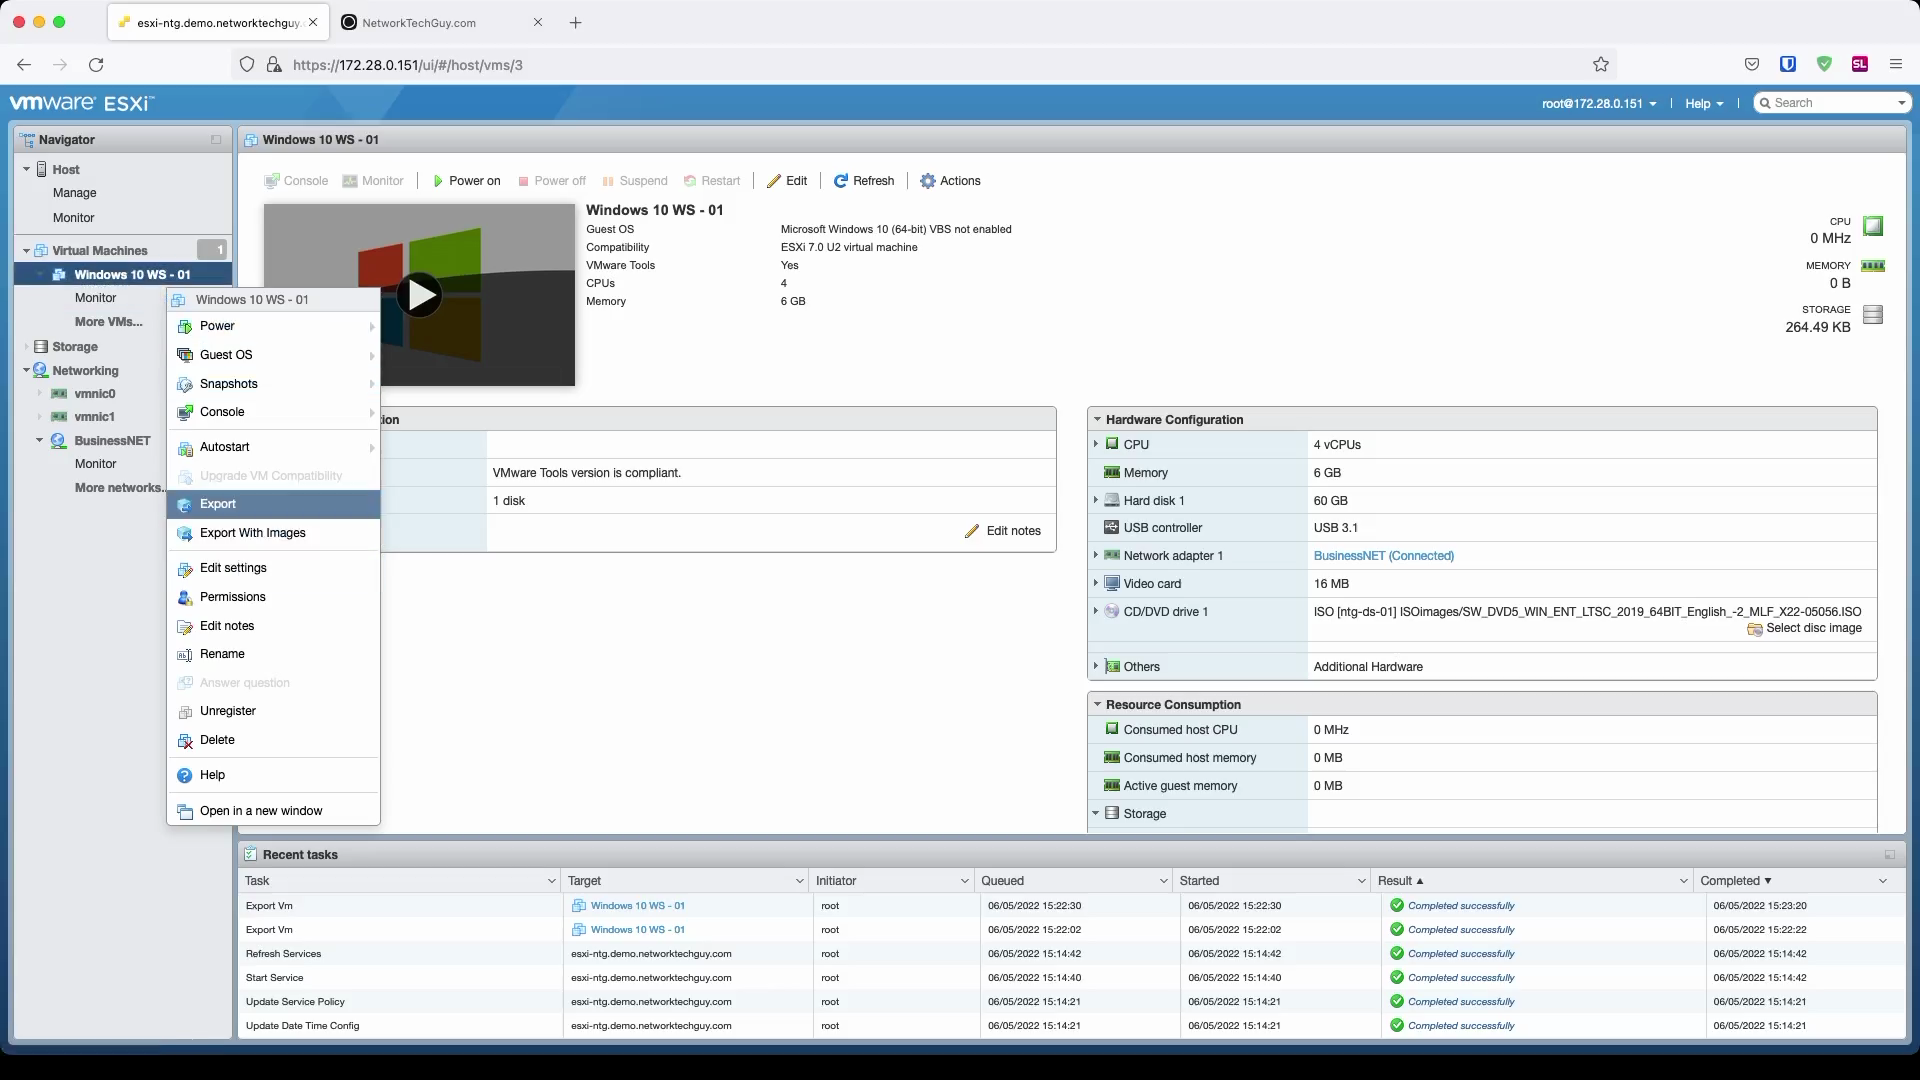
To export your VM, you first have to power it down. Right-click on your VM on the left side of the screen and choose Export. This will open a new window where you can select which VM files you want to download to your computer. Note that there is an option to download the ISO image as well and the reason for that is because it is still attached to the VM. Remember, when we were creating the VM we had to point it to the ISO image in the datastore. Unless you dettach it from the VM, it is going to stay there, and if the drive shows as connected in the Customization screen, it will even show up in This PC in Windows - same as if you left the CD/DVD in the drive of a physical PC.
Since the VM is now powered down, we can freely edit settings of the VM. Right-click on it and choose Edit settings.
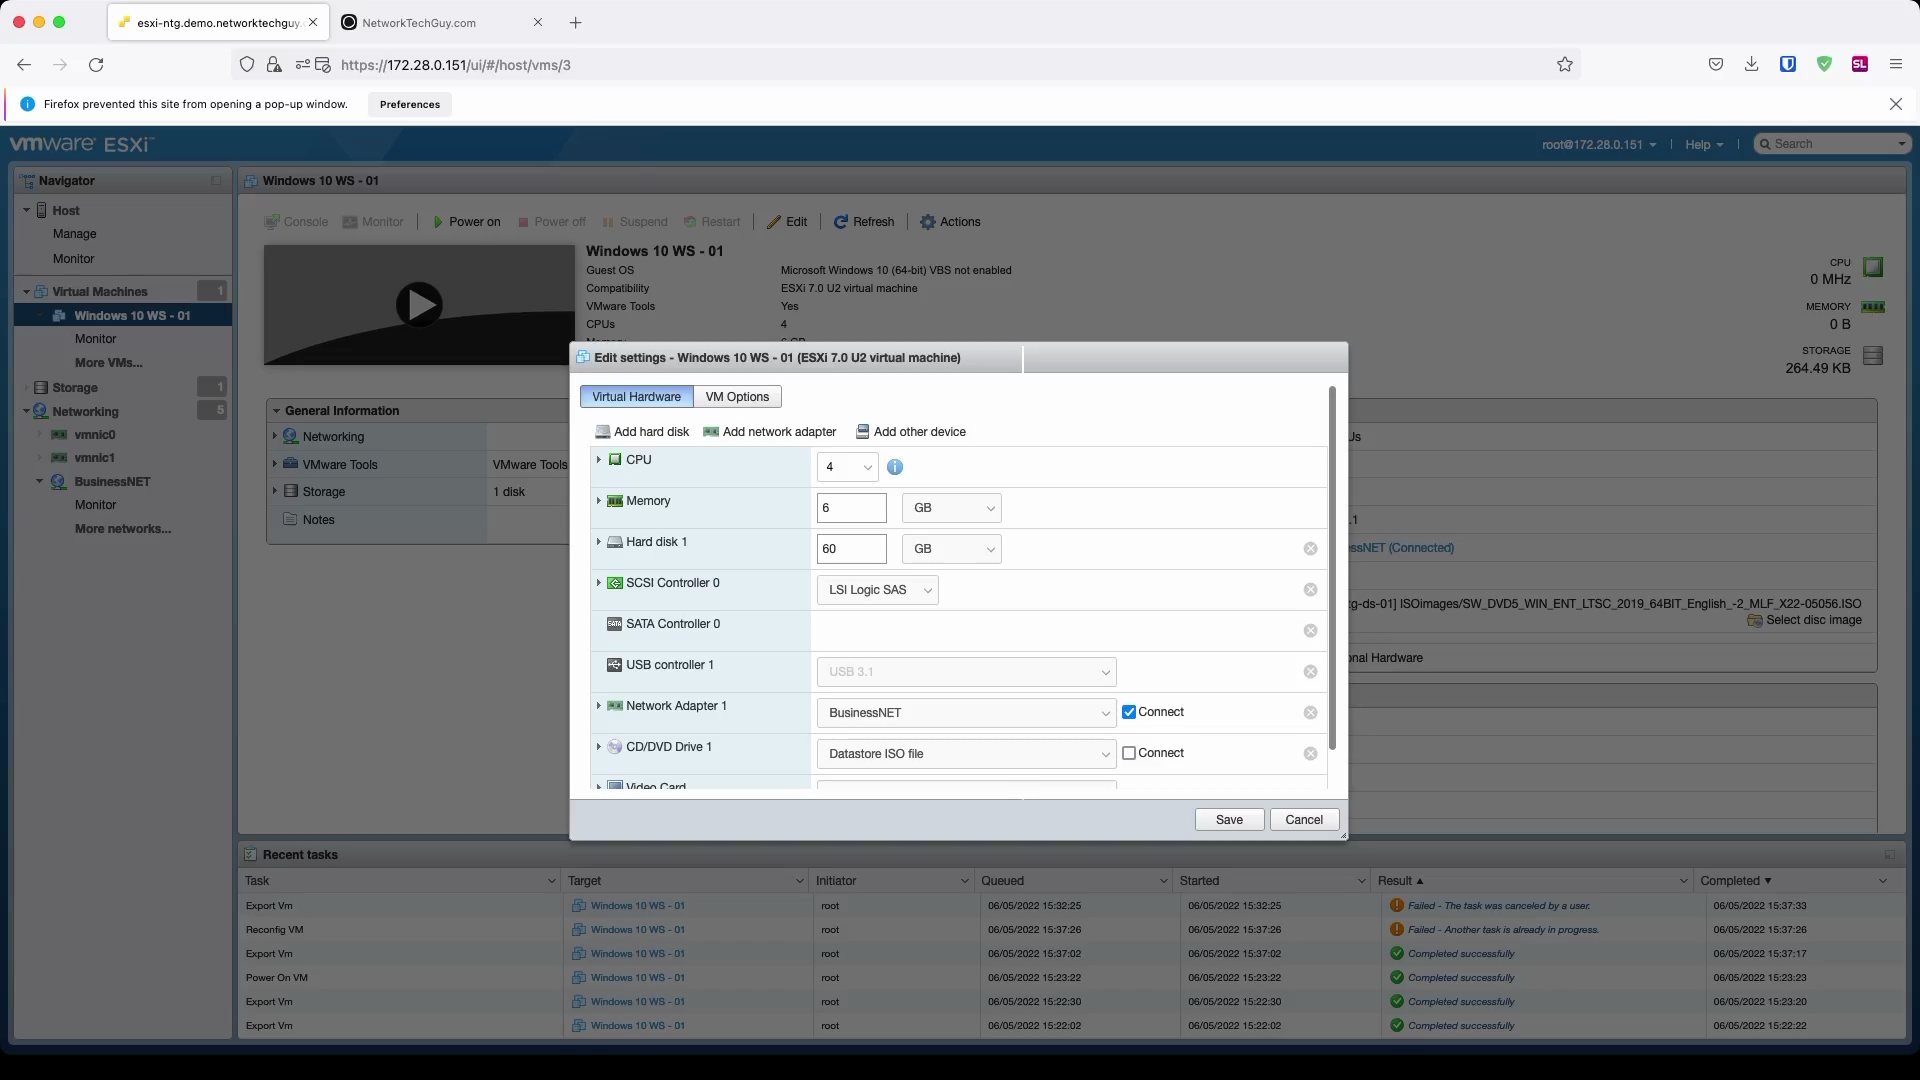
Notice that in my case Datastore ISO file is attached to the VM, but it is not connected to it. An equivalent would be if you had the CD/DVD in the drive, but the drive was disconnected from the computer. Since I won't be needing CD/DVD drive in the future, I usually just click on the x sign on the right and remove it from the VM. You can do that as well, or you can choose Host device instead. Make sure that it stays disconnected (checkmark disabled).
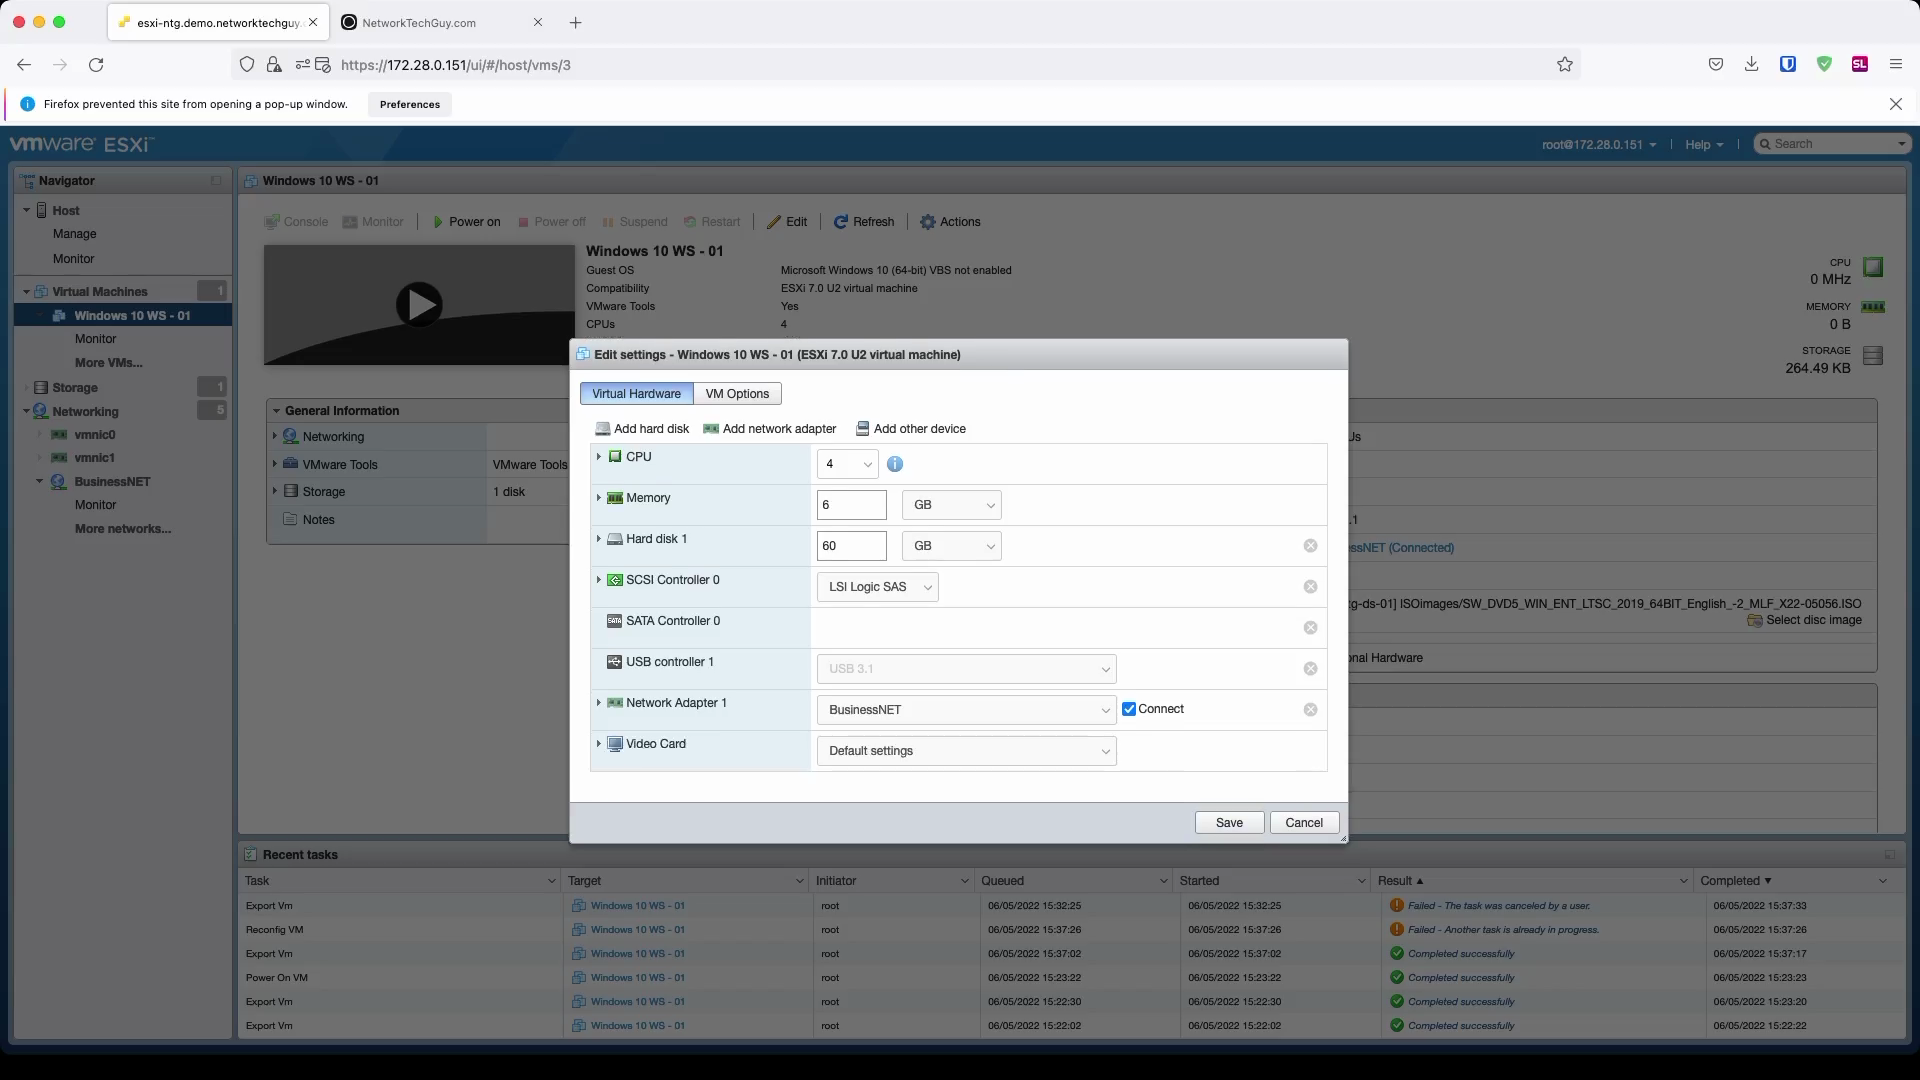
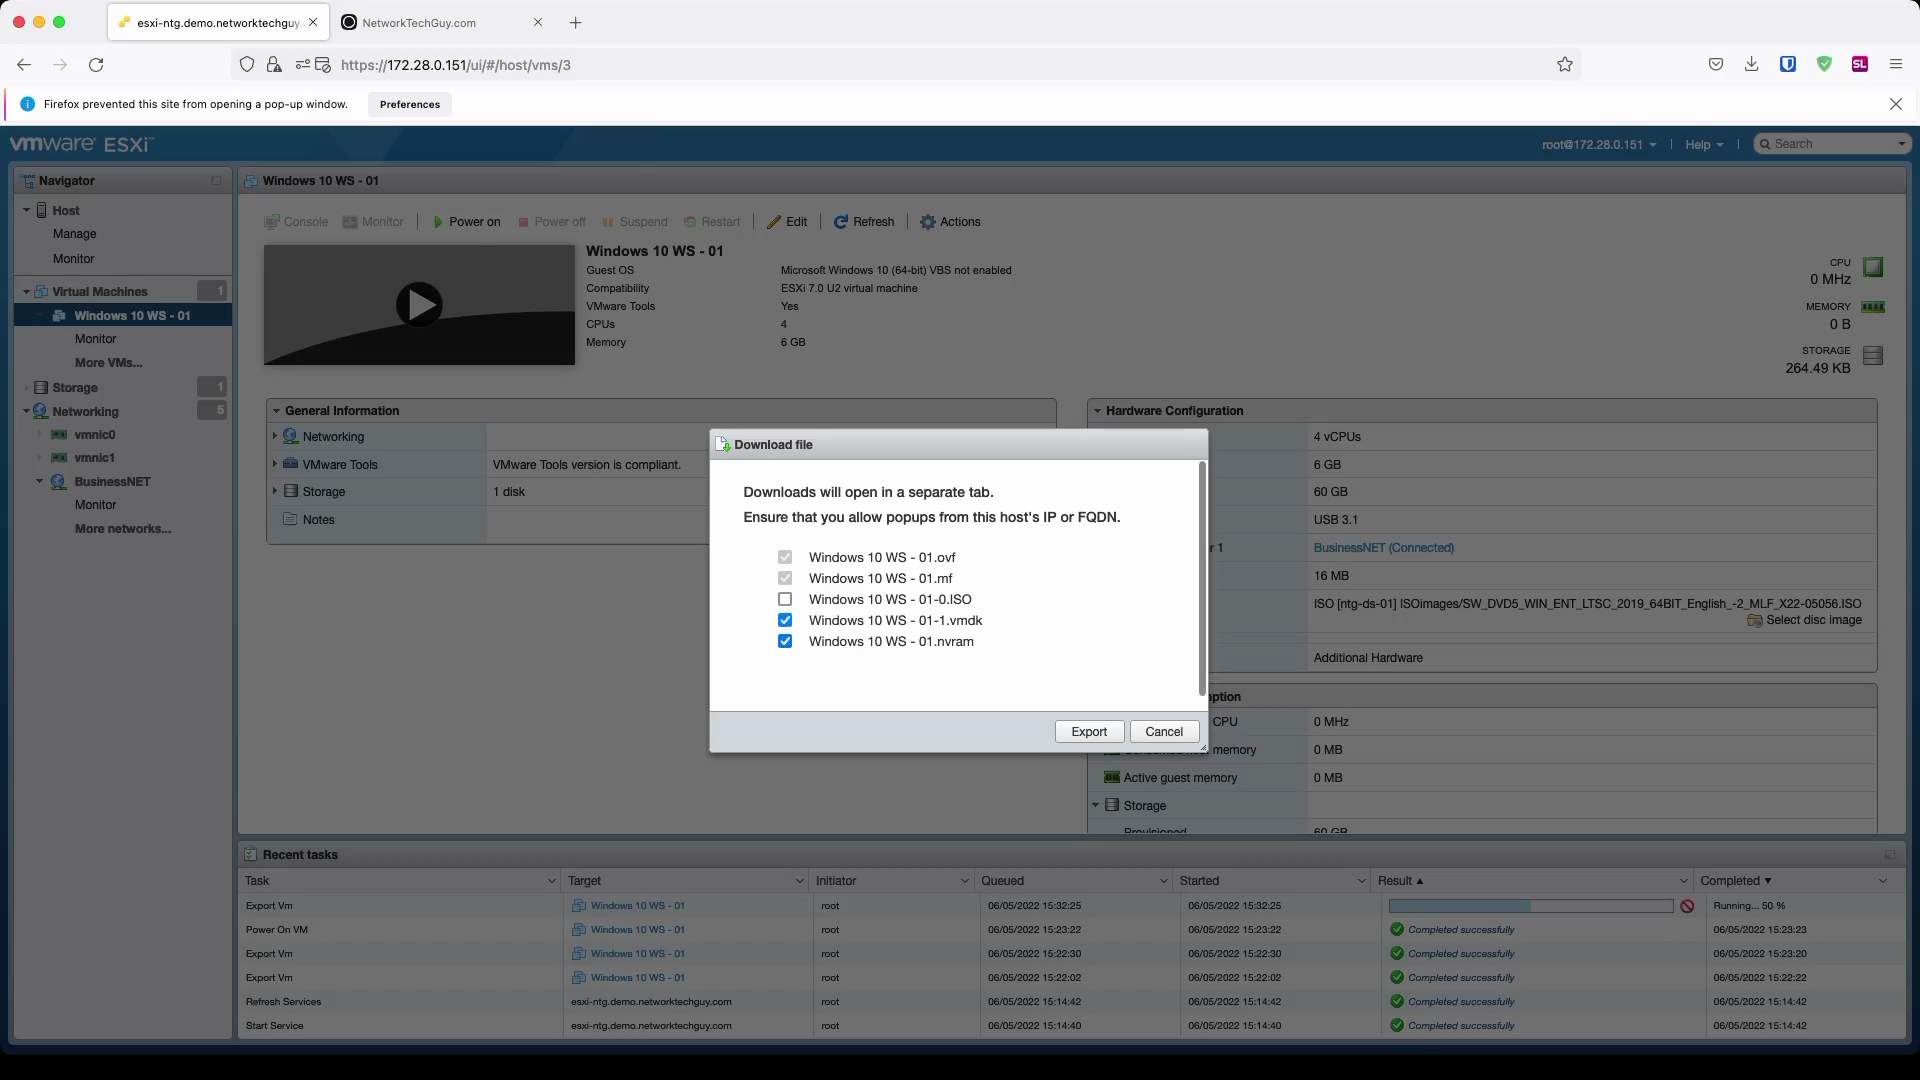
Now, if you do the Export again, you will notice that ISO image is no longer showing up.
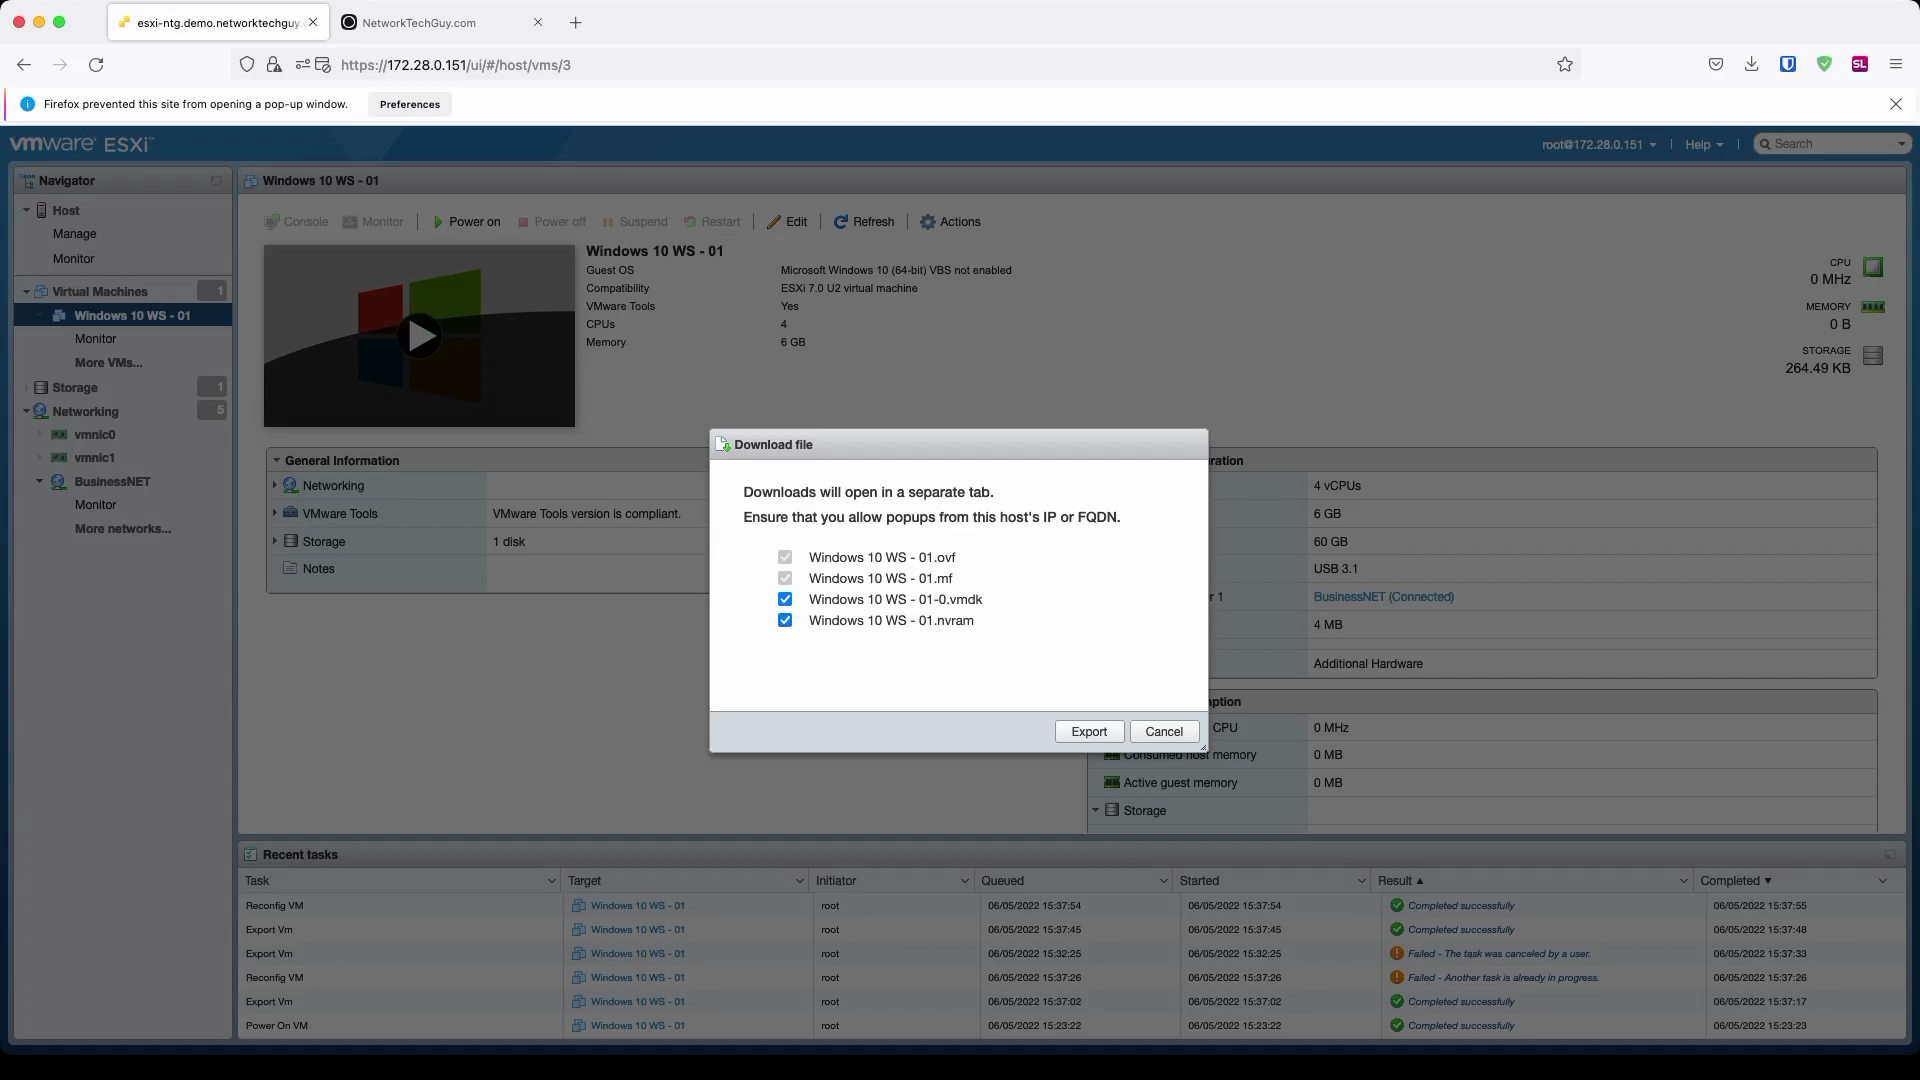
If you click on Export, make sure that you allow pop-up windows from your ESXi host, otherwise the download process won't start. When everything's downloaded, save the template somewhere on your disk or NAS if you have one and you will be able to apply this template in the future whenever you need it.
Side-note: You will notice that the largest file you have to download is the one with the extension .vmdk. This file is a representation of your hard drive attached to the VM. Basically, whatever is on your hard drive in the VM, it is actually in this one file! Please be aware that this file could be quite big, especially if you chose Thick provisioned at the beginning of this whole process!
And this is it - you have your first VM in ESXi and you can play with it as much as you want - it will not affect your physical PC in any way.
Please note that if you were following this diagram:
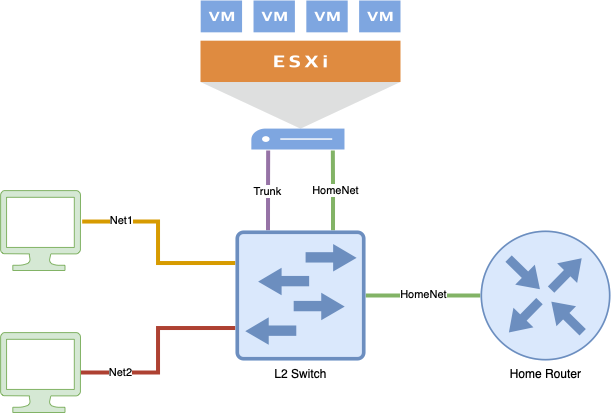
your VM will not be able to talk with the rest of the network, including your physical PC. The reason for this is simple - Net1, or BusinessNET as we called it, still doesn't have a working GW that you could use.
In the video I shared you may notice that I can actually get to the Internet and download everything, but that is because I'm actually using my external VLAN and an external firewall to access everything.
If you want to do everything that I did in the video, you may want to change the following:
- set the
Network Adapter 1in the VM settings toVM Network; this will make the VM part of your Home Network and it will be able to communicate with the rest of the physical infrastructure you may have - make sure to either set the IP address to static and to be in the same subnet as your Home Router or set it to DHCP if is a DHCP server
In one of the following posts we will create our own virtualized firewall and at that point you will be able to set the IP addressing to whatever you choose and use that firewall as a gateway for your virtual and physical machines.
Until then, have a great reast of the day!
Member discussion